Entries Tagged as ''

Behind the Exif: Bolt ( Lightroom Tutorial – Why I shoot Raw!)

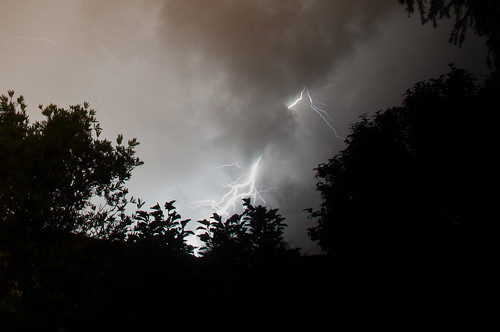
Remember my photo of the bolt of lightning from the other day, I thought I would show you how I went from the photo to the final image via Lightroom 3.3.

This also may help to show why I use Lightroom all the time for my post processing, and why I shoot RAW.

(All the images open in a new window, in lightbox mode )

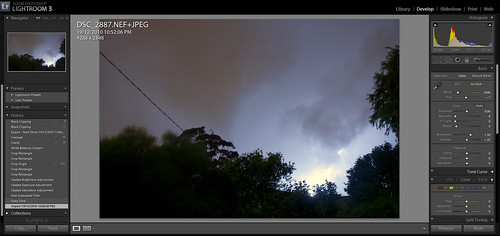
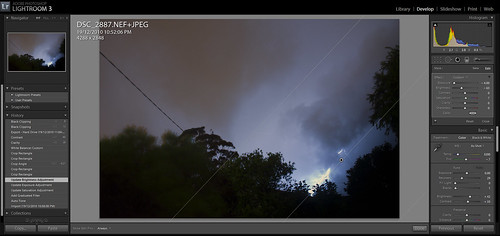
Stage 1: Opening the Raw file in Lightroom, which shows you the shot as taken.  On the large version of the image you can see all the details about the image.

1/8 - lighting-import-raw

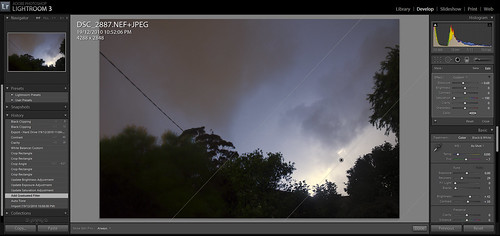
Stage 2: A gradient filter is placed on the bottom right hand corner, where the image is obviously over blown from the lightning bolt. ( You will notice a new box of controls has opened underneath the Histogram, which are the Exposure, Brightness, Clarity, Contrast etc controls just for the gradient ) I drew a gradient in the bottom right hand corner to deal with the lightning bolt only.

2/8 - lighting-add-grad-filter

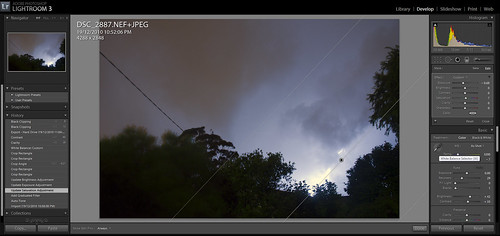
Stage 3: This was a fix to the Saturation. The Graduated Filter always remembers the last settings it was on. So I needed to reset the values back to default settings, so then I could establish the baseline values I was after.

3/8 - lighting-filter-exposure

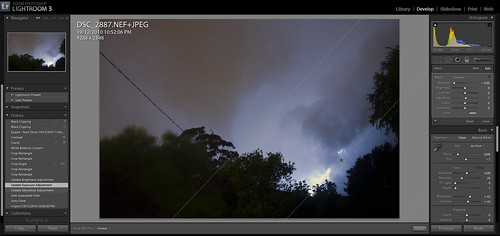
Stage 4: Dramatically under exposing this part of the shot, whilst on the gradient brought the bolt out of the background.

4/8 - lighting-final-filter-brightness

Stage 5: This was a change to the Brightness only on the gradient. This meant I could pull the corner of the image down from its over exposed values.

5/8 -lighting-finish-filter

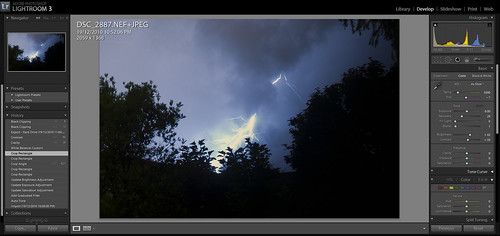
Stage 6: Cropping took the longest to get right. I wanted to pull the shot in for the most dramatic effect, whilst still having a large enough image.  Also I wanted to keep some of the foreground elements in place to frame the image. You may also notice the Histogram for the image is now a lot more balanced as well, post crop.

6/8 - lighting-crop

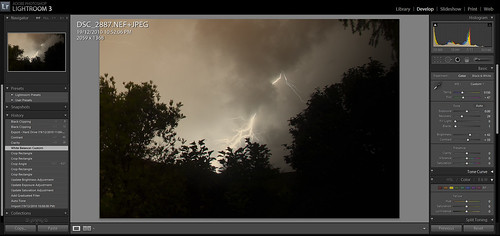
Stage 7: White balance is very easy to configure in Lightroom, via the eyedropper.  Moving the eyedropper around the image, you can see the change in real-time in the small preview window.  I went for a colour that was closer to reality from the clouds, than the lightning.

7/8 - lighting-whitebalance

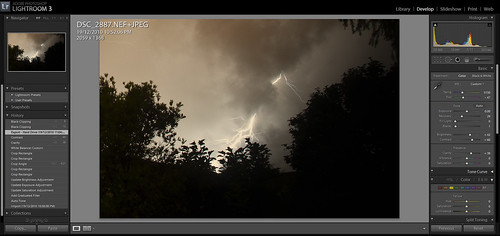
Stage 8: A small tweak to the Contrast and Clarity of the image, just to bring the lightning bolt out and sharpen the image a bit. Then Export. ( I have a Flickr template set up, which is 1920px along the long edge and 72dpi )

8/8 - lighting-final

This took about 5 min to get right, most of which was playing with the crop. ( The shot was taken outside my house at 10:52,  then the time codes were 10:58 import, 11:04 export )

As you can see, shooting with RAW, meant that I got a good photo out of what would have been a bad JPG. My only regret is that I had to crop to much, but that was the weathers fault, not mine ( well I am blaming the weather ).

The EXIF info:

Camera Nikon D90
Exposure 30
Aperture f/11.0
Focal Length 18 mm
ISO Speed 400
Exposure Bias 0 EV
Date and Time (Original) 2010:12:19 22:52:06
Date and Time (Modified) 2010:12:19 23:04:58
Exposure Program Manual

And the final Shot…..
Bolt

Ten of my fav shots of 2010

In no particular order….. with a few details on why I choose each of them.

Of course, I will walk away from this blog post, and go… oh shit, what about x or y…  but these are the stand outs for differing reasons.

But one thing these shots have in common is getting out there.  Sitting behind the computer may get you a few shots, but going out in the rain, the heat, the crowds, the isolation will get you the good photos.

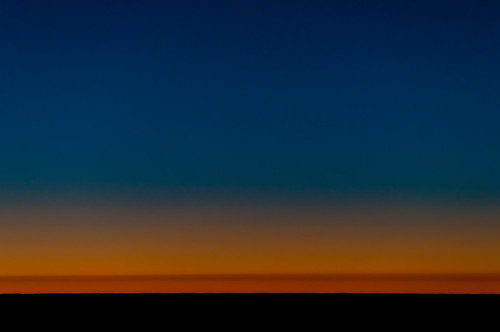
10,000 Meters

10,000 Meters

Taken from an aircraft window, the colour for me tells the story.  This is one of my no subject matter shots, that says photography is still art.
Buy this at Redbubble

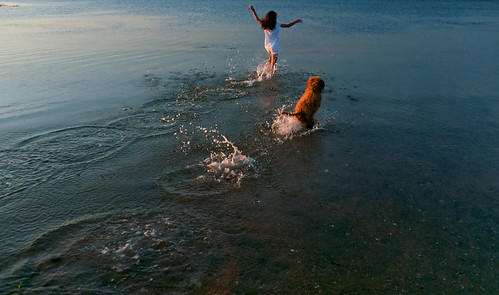
Freeeeedom

Freeeeedom

Taken at Brighton Beach, this shot for me is about fun, summer and expression. And a lot of luck to get all the elements and the camera in play at the same time.
Buy this at Redbubble

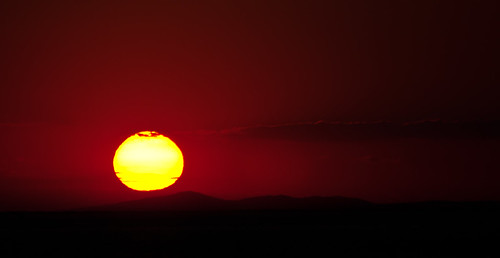
The end of 10

The end of 10

Oh so many sunsets to choose from….  This one has it all, the light, the colour, shapes and silhouettes.
Buy this at Redbubble

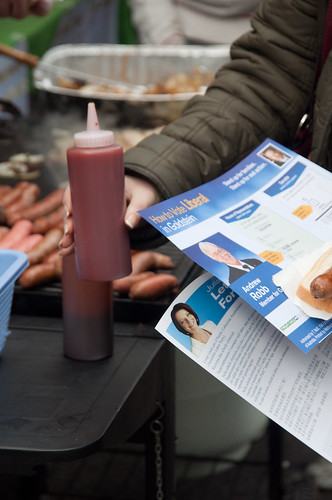
Voting in Australia

Voting in Australia #snagvotes

I was really pleased with this shot, one a quite a few, trying to capture what Voting in Australia really means.

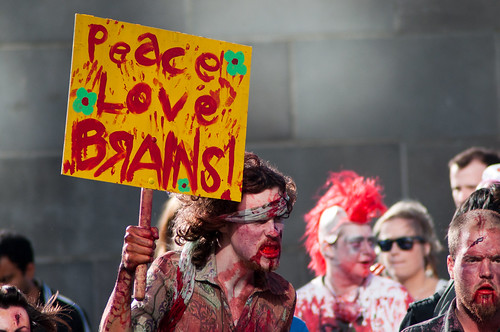
Peace Love Brains

Peace Love Brains

For the life of me, I have no idea how I got the lighting on this shot so right. Taken at the Melbourne Zombie shuffle.

We Shall Remember them

We Shall Remember them

This is the first dawn service I have got up for in quite sometime.  One of the hard things, was trying to find a place to get a photo from, due to the crowds.
Buy this at Redbubble

Some people are just born Republicans

Some people are just born Republicans

Taken the day after I got my new 300mm lens, this is a still photo as a story.

The Way Home

The Way Home

Still one of my all time fav shots. This shot is a what the camera see’s, not what I saw.  And is the shot I was aiming for. I could see all the details in the dim light, I set the shot up to remove them and it worked.
Buy this at Redbubble

Closing up for the Day

Closing up for the Day

The depth of field and colouring in this shot all just sat together perfectly for me.
Buy this at Redbubble

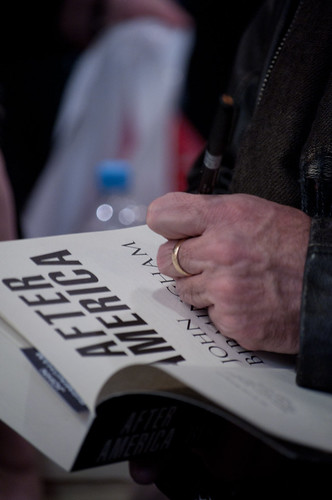
@JohnBirmingham signing his new book After America

@JohnBirmingham signing his new book After America (Close up)

I was trying to get a photo of John, but one that told a story, not just a “fan” photo. This I felt was the essence of why he was where he was at the time.

Missing from the Exif: Sometimes the light is perfect

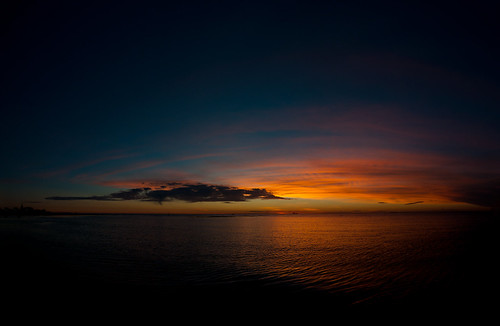
Magic hour, the hour around sunrise and sunset is called that for a reason.  The best light can be found when you have  a touch of luck and a lot of patience.  This shot was taken from what was a fairly average sunset.  But instead of putting the camera away and heading home, I stayed out for another 30 minutes, to grab the last touch of light.

In taking this shot, I wanted the whole sky, even with my 11-16mm Tokina, I still didn’t feel I had the whole sky.  Thus I went for the panorama.  When lining up the shot, the one thing I did notice, standing on the foreshore was the small waves lapping on the shore.  When trying to line up a panorama, waves are just a path to heart ache.  So I walked out till I was thigh deep in the water, passed the lapping waves.

This is a handheld panorama of about 10 shots, with a lot of overlap.  When shooting panorama’s always shoot in manual mode.  That way, when the shots merge, you will have consistent levels across each shot. Checking one shot that balances the light and dark will mean that your levels will be averaged out. The final image is 6335 x 4133 ( compared to 4288×2848 from the D90 )

Also this was one of my first sunset walks with the new GPS, but for some reason, my GPS decided I was 10 meters above sea level.

Camera Nikon D90
Exposure 0.004 sec (1/250)
Aperture f/6.3
Focal Length 16 mm
ISO Speed 250
Exposure Bias 0 EV
Flash No Flash
Date and Time (Modified) 2010:12:04 21:56:54
Exposure Program Manual
Date and Time (Original) 2010:12:04 20:44:05.00+11:00
Date and Time (Digitized) 2010:12:04 20:44:05
Max Aperture Value 2.8
Custom Rendered Normal
Exposure Mode Manual
White Balance Auto
Focal Length In35mm Format 24 mm
Image Number 87921
Lens 11.0-16.0 mm f/2.8
GPS Version ID 2.2.0.0
GPS Latitude 37 deg 54′ 57.54″ S
GPS Longitude 144 deg 59′ 8.35″ E
GPS Altitude Ref Above Sea Level
GPS Altitude 10 m
GPS Date Time 2010:12:04 09:44:02Z
GPS Satellites 10
GPS Img Direction Ref Magnetic North
GPS Img Direction 8.3

( Linked image is to lightboxed version as well, which looks much nicer )

Sometimes the light is perfect

And you can buy this as a print from RedBubble as well

Xmas shipping times for my Redbubble stuff…

These are the order dates for people in Australia…

If you want to buy one of my t-shirts as an Xmas gift, you only have until Dec 11.

Like this Getty Flickr Grab finalists image… as a print…

More framed prints/posters and canvas prints here.

Or my very popular #qanda t-shirt

The rest of my t-shirts/hoodies/stickers and baby clothing here

Note, white t-shirts and hoodies are still 15% off as well, till xmas day.

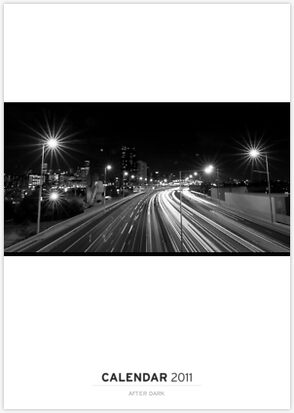
Or a calendar… which is 12 of my photos… in one collection.


RedBubble calendars are printed using marvellous futuristic technologies, so complex we can’t go into them here, but we can tell you they are lovingly printed on a luscious 200gsm satin art paper at the striking size of A3 (that’s 297x420mm, or 11.69×16.54″).

The rest of my calendars are here

First Impresssions… Solmeta Geotagger Pro on a Nikon D90

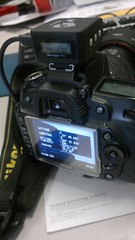
Solmeta GPS Pro Mounted on a Nikon D90I finally got a GPS for my D90, so I thought I would write down a few first impressions, before I do a big review later once I am more settled into using the device.

I have been wanting a GPS for my Nikon D90 since the day I got my camera.  Why, I liked to geotag things.  My work flow has been go out take photos, remember to turn on GPS software on phone, make a track file on phone, remember to turn track file off, hope track file isn’t corrupted, export GPX file, open GeoSetter, plug phone into compimport GPX File, save files……. all rather tedious. Also with a number of fail points built in.

Now, work flow is, turn on camera, turn on my Solmeta Geotagger Pro, take photos, done.  Yes, it worked.  I do like when first impressions are, good.  No manual reading was required ( good for me, being male and all ), and away I went. A couple of quick tests for accuracy seem to be close, altitude seems to wander a bit up and down by a few meters, and took a while to get the first fix in Australia. Also the digital compass seems to wander a few degrees when taking shots.

As for the GPS itself. Wow, is it fast.  Almost aGPS fast actually. First time I fired it up, the display showed the lat and long for China, where the GPS was tested, less than a minute later after putting it on the window ledge at work, it had a fix for the new location.

I am glad I went to the extra expense and brought the Pro version as well, the display and extra functions are really coming in handy.

I love the extended GPS info I now get in my metadata as well.  The number of Satellites is great for giving a level of accuracy to the GPS data as well. And the compass headings, whilst take me a while to get used to working in digital format, will give me directions.

GPSVersion ID 2.2.0.0
GPS Latitude 37 deg 55′ 33.87″ S
GPS Longitude 144 deg 59′ 8.77″ E
GPSAltitude Ref Above Sea Level
GPSAltitude 17 m
GPSDate Time 2010:12:01 08:46:36Z
GPSSatellites 06
GPSImg Direction Ref Magnetic North
GPSImg Direction 85.5

So far so good…

I was considering buying the N2 version, but am after less than a day, glad I went with the Pro version. The LCD, whilst small is still good enough to read, and I know I will use the data logging feature.  That way I still have a backup track as well.

Geotagger Pro Geotagger N2
GPS information

acquired

lat/long, alt, and UTC time lat/long, alt, and UTC time
Orientation Yes. (3 axis electronic

compass, output heading)

Yes. (2 axis electronic

compass, output heading)

Battery Yes. 20-Hours. Yes. 20-Hours.
LCD display Yes No
Gradienter Yes No
Speed Yes No
Internal memory Yes(8M) No
Record GPS position

as tracking walk.

( Data logger)

Yes No
Working indoors Yes Yes
Compatible

models

Nikon D3x, D3, D700,D300S,

D300D2XS,D2X,D2HS&D200,

D90,D5000,Fujifilm S5 Pro

Nikon D3x, D3, D700,D300S,

D300,D2XS,D2X,D2HS&D200,

D90,D5000,Fujifilm S5 Pro

Dimensions

(L X W X H )

62X42X23mm 54X35X20mm
Weight 50g 35g

So for first impressions, I am very happy, and already am using a feature set that goes way beyond what the Nikon GP1 model could ever do, and unlike the GP1 model, this thing works as well.  Still lots more testing to do, so that will be my excuse for heading to the beach to get some photos at least for while…

Late Change ( showing new GPS Exif data )