Missing from the EXIF: Lightroom Tweaks to Contemplating the day that was
So I finally have a Nikon D7000 to play with. Sadly it is not mine however, and I shall cry myself to sleep for a while over that.
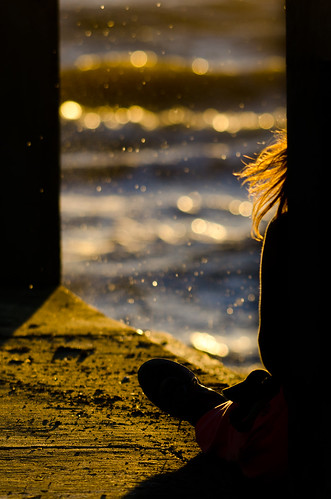
To put the camera through it paces I thought I would head to one of my usual spots, take just the Sigma 150-500mm lens and see what I could get. Whilst looking for shots, I walked back from the jetty a bit and found the perfect composure I was looking for. I am a big fan of taking photos of people, where you can’t tell who the person is. If you want to enter shots into competitions for example, they often want release forms for the subject. Not having the subject identifiable fixes this issue.
I took 18 shots to get this one,whilst it is either the first or last shot that ends up being the keeper, this was in the middle of the series. I was looking for a breaking wave and the girls hair to be flowing just the right amount. All the while I was kneeling on concrete to get the right angle for the shot as well.
Here is the Final Version of the Image as you can buy it on Redbubble
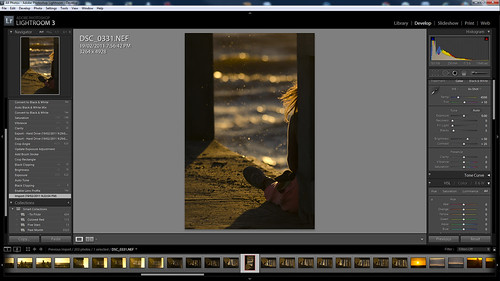
Each of these images opens into a new tab/window, in Flickr Lightbox mode so you can see all the details. These are untouched screenshots, so that you can see the whole process I went through. You will notice a few extra steps, where I tried a few things, which didn’t work, then carried on, such as a black and white version. But I haven’t commented on them.
The time frame for this processing was just under 5 min of actual sitting in front of the computer time.
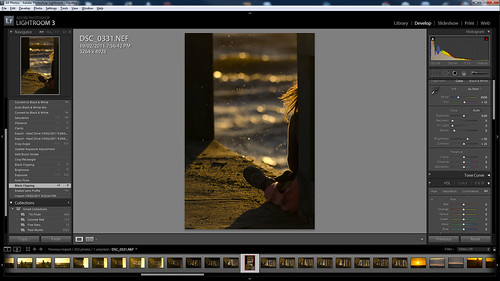
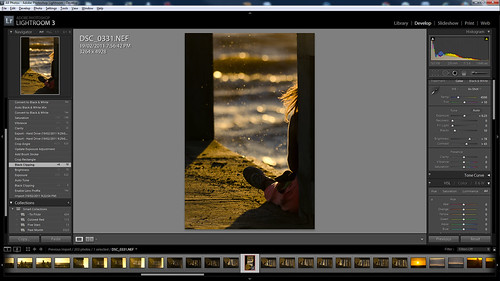
Stage 1: This is the Raw Shot. So, I know I have the composition right, but the colour balance and weighting of the shot isn’t quite what I was after…
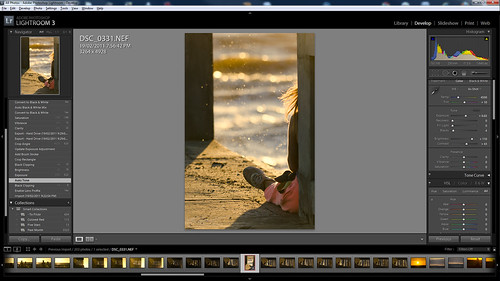
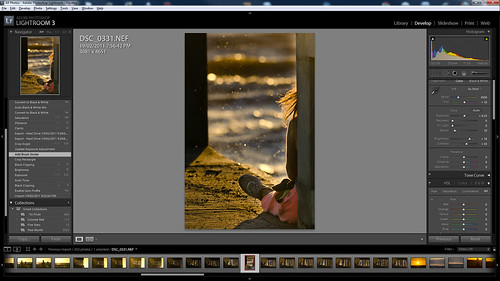
Stage 2: As my Sigma 150-500mm Lens is in the Lens, issues such as barrel distortion, vignetting and chromatic aberration can be fixed in one click.
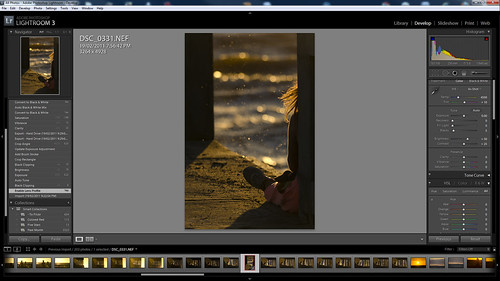
Stage 3: I knew I wanted to pull the blacks up in this image, so I did a quick tweak of the black clipping just to see if it was worth progressing with the image processing. Often, once you start processing, with an end result in mind, you will come across images that you just decide not to finish with.
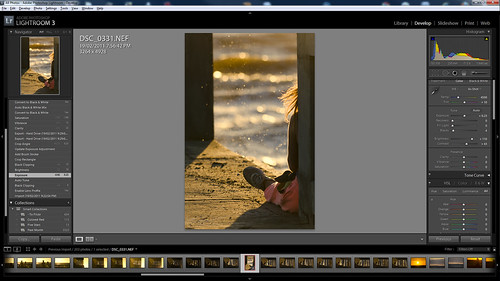
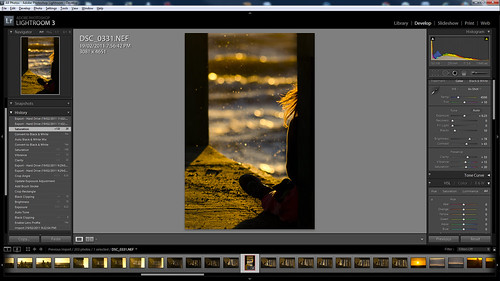
Stage 4: Ah Autotone… I like you as much as I hate you. It always overblows shots as far as I am concerned. I always end up pulling the shot back, but it can be a good quick fix to a number of issues.
Stage 5: And yep, the next thing after the autotone, is to pull the exposure back from the +0.65 that Lightroom’s Autotone did, back to +0.23. So some of the image is brought out, but not to much.
Stage 6: And like Stage 5, this was a tweak to pull the brightness down, so that the image is a lot more muted over all.
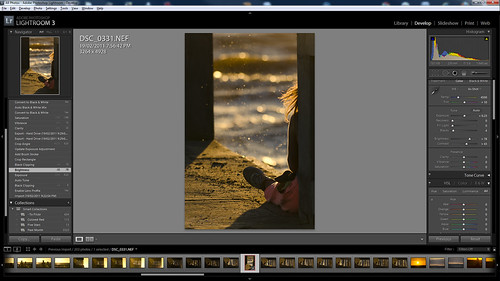
Stage 7: I needed to go back and pull the blacks up a bit more at this point, to push detail out of the shadows that had crept in so that your eyes follow the lines in the image.
Stage 8: Hand holding a 3kg lens of camera and lens in high winds whilst kneeling on concrete does of course mean your shot is never going to be perfectly straight. This was just a tweak to the rotation to line up the vertical elements.

Stage 9: This is a two stage process. Firstly using the Brush Stroke tool, I selected the girl, and the pole she was leaning against so that I could apply a filter directly to just those parts of the image. As Lightroom, remembers the last settings, it of course made them over exposed, but it is handy to see the shapes that I was covering.
Stage 10: Now I just reduce the exposure on the brush tool path, from 1 to -0.88, which drops the colour and the detail from the girl leaving a stronger shadow and removes the distraction of the details of her clothing, but keeps her hair and the rest of the image in balance.

Stage 11: Once you have finished doing the major changes to the balance of an image, what looked straight before may not look as straight again. So this was to fix the aesthetic straightness of the image.

Stage 12: In all the above tweaks the golden colour had become a little washed out. So this was just a tweak to the Clarity and Vibrance to pull the image up a bit.

Stage 13: And to finish off, just a small push to the saturation to ensure the image colour and feel was as rich as I wanted.
And the Exif Data for the Shot:
| Camera | Nikon D7000 |
|---|---|
| Exposure | 0.002 sec (1/640) |
| Aperture | f/5.6 |
| Focal Length | 250 mm |
| ISO Speed | 100 |
| Exposure Bias | 0 EV |
| Flash | Off, Did not fire |
| Date and Time (Modified) | 2011:02:19 23:02:36 |
| Exposure Program | Shutter speed priority AE |
| Date and Time (Digitized) | 2011:02:19 19:56:42 |
| Max Aperture Value | 5.7 |
| Subject Distance | 10 m |
| Metering Mode | Multi-segment |
| Custom Rendered | Normal |
| Exposure Mode | Auto |
| White Balance | Auto |
| Focal Length In35mm Format | 375 mm |
| Scene Capture Type | Standard |
| Gain Control | None |
| Contrast | Normal |
| Saturation | Normal |
| Sharpness | Normal |
| GPS Latitude | 37 deg 53′ 28.29″ S |
| GPS Longitude | 144 deg 59′ 6.89″ E |
| GPS Altitude Ref | Above Sea Level |
| GPS Altitude | 2 m |
| GPS Map Datum | WGS-84 |
| Creator Tool | Adobe Photoshop Lightroom 3.3 |
| Lens | 150.0-500.0 mm f/5.0-6.3 |
| Approximate Focus Distance | 10 |
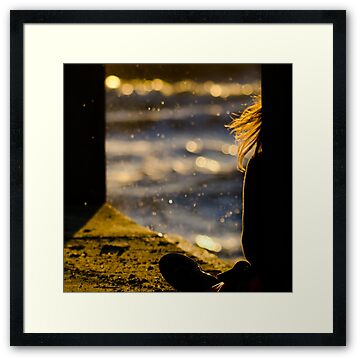
and the Flickr Version of the Shot…