Missing from the EXIF: Dawn
Between a rushed trip to NZ to deal with issues arising from Grandparents moving into a home, to working 5 jobs. Well 1 day job and looking after the #wolfcatcubs and being really crook for the last week, the poor blog has been somewhat lacking in updates.
So here is a quick one, looking at one of the shots from the #wolfcatnz trip.
This was Dawn over Golden Bay. I am also more impressed that I was even up that early given the large percentage of a bottle of Bushmill’s Black Bush that my Grandfather and I manged to drink the night before.
Given my lack of predilection to being up at this hour, the shot was taken in Auto No Flash Mode.
The following are the screen shots for the “Developing” I did in Lightroom 3.6.
This was about 5 min of work in total.
( Each of these images opens in a new window to Flickr, where you can view the full size screen grab )
As with most of my photography, I’d like to give a big shout out to the location for making the shot possible.
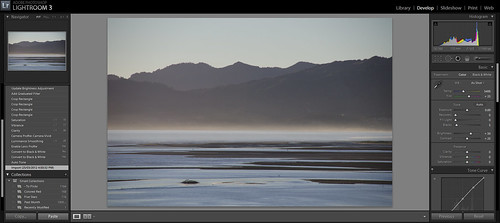
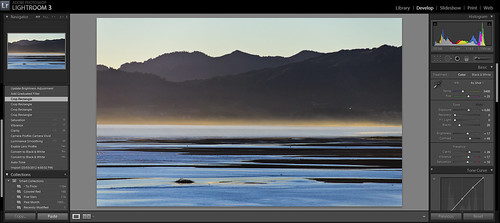
Stage 1 – The Raw File
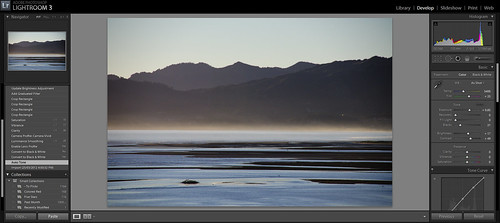
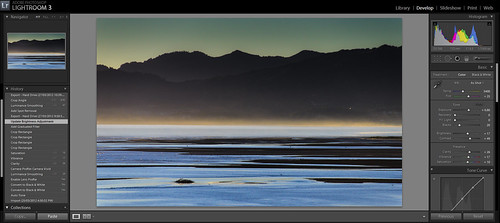
Stage 2 – Auto Tone ( can be handy to see what needs to be corrected, although I find it tends to over expose to my taste )
Stage 3 – Lens Correction. Having these built in saves so much time. In this case, it was for my good old Sigma 18-200mm.
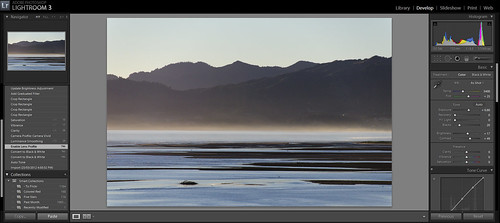
Stage 4 – Camera Profile – Vivid. To bring out the richness of the tones I was looking for in the image. ( ah shooting Raw I do love thee )

Stage 5 – Clarity/Saturation/Vibrance – Tweeks to make the image sing that little bit more.
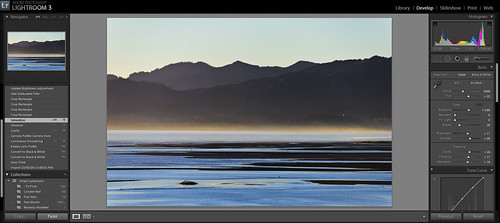
Stage 6 – The all important crop. Bring the image down to where I wanted it. Not so top heavy for starters.
Stage 7 – Graduated Filter. With the sun quite high in the sky and focal points being on the shadowed hills, the sky was a touch over blown. ( and while yes a set of Grad Filters is on my to buy list, I don’t have them yet. )
Stage 8 – I often refer to this stage as the … oh didn’t see that till I uploaded it to Flickr Stage. In this case, Stage 8 involved a small correction to the crop angle and I removed one spot of reflection from a building. When looking at the image large, the sun hotspot reflection draws your eye in the wrong direction.
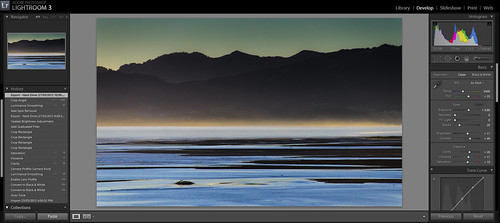
I hope you are as happy with the final image as I am. Five min in lightroom can be well worth your time.
And the EXIF Data.
| Camera | Nikon D7000 |
|---|---|
| Exposure | 0.001 sec (1/1000) |
| Aperture | f/6.0 |
| Focal Length | 155 mm |
| ISO Speed | 560 |
| Exposure Bias | 0 EV |
| Software | Adobe Photoshop Lightroom 3.6 (Windows) |
| Exposure Program | Auto No Flash |
| Date and Time (Original) | 2012:03:23 06:06:38 |
| Date and Time (Digitized) | 2012:03:23 06:06:38 |
| Max Aperture Value | 5.9 |
| Subject Distance | 4294967295 m |
| Lens Info | 18-200mm f/3.5-6.3 |
| GPS Version ID | 2.3.0.0 |
| GPS Latitude | 40 deg 48′ 34.12″ S |
| GPS Longitude | 172 deg 47′ 26.59″ E |
| GPS Altitude Ref | Above Sea Level |
| GPS Altitude | 34 m |
| GPS Time Stamp | 19:06:37 |
| GPS Satellites | 11 |
| Creator Tool | Adobe Photoshop Lightroom 3.6 (Windows) |
| Metadata Date | 2012:03:27 21:58:40+11:00 |
| Lens | 18.0-200.0 mm f/3.5-6.3 |
| History Parameters | converted from image/x-nikon-nef to image/jpeg, saved to new location |
And of course… Here is what the Framed version looks like if you were to buy it via RedBubble ( go on click it…. 🙂 🙂 )


Discussion Area - Leave a Comment