Entries Tagged as 'Missing from the Exif'

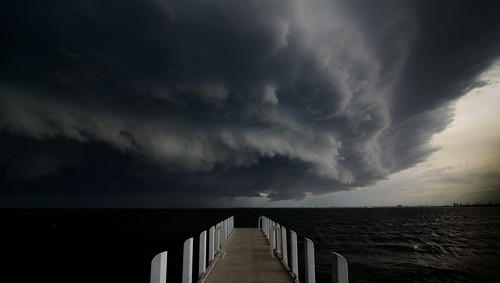
Behind the Exif: Armageddon inbound

Inbound Storms

The trick to any good weather photo… is wait for it… good weather.  And as far as weather photos go, the stormier the weather is, the better the photo will be.

Finally after 3 days of build up of hot and humid weather, Melbourne finally got a decent storm front with the cold change coming in at Monday lunch time.

So here is how I created my Armageddon inbound photo.
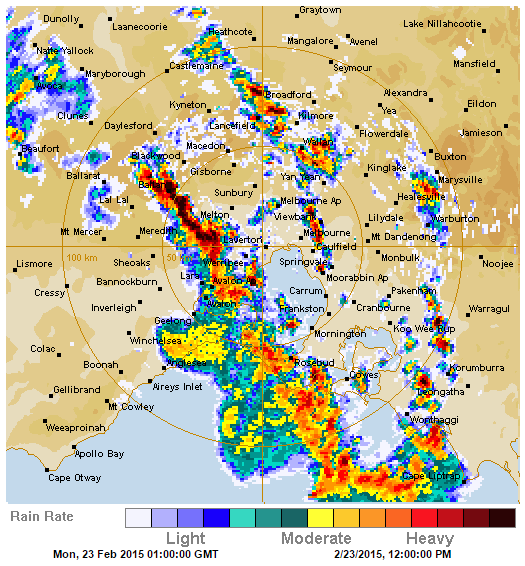
radarPoint 1: Know the weather.  This is the radar trace as the storm lines moved towards the CBD, which is about when I knew to head to the photo location.  You don’t want to get to your location for a storm front to early, there won’t be anything to see, and you don’t want to get there to late, you might just get very very rained on.  And if you are very lucky you will get a nice bit of sun still illuminating your foreground subject matter. 15 to 20 minutes before it is going to rain at your location is a good starting point where the gust front clouds are at their best.

Point 2: To make a good panorama, forget auto-mode on your camera.  Manual mode will be your friend down the track.  All of the shots I used to make the pano were shot with the same settings.  This way it is easier to balance the settings as opposed to having to tweak each photo when shot auto which will have different shutter speed, ISO and aperture.

All these shots were taken with the following settings:

Camera: Nikon D7100
Lens: Sigma 18-35mm
Focal Length: 18mm
Shutter Speed: 125 s
Aperture: f/7.1
ISO: 100

Point 3: You can not take to many photos for a panorama.  Lots and lots help, the more overlap between shots the easier it is for software to stitch the images together.  However when shooting a storm, you have to move fast, the clouds move a lot in even one minute, so put the camera in landscape mode for shooting and shoot fast and often.

Point 4: Now comes the fun part… putting it together into a single image.  My choice of software for this was Adobe LightRoom to process the Raw files… ( you do only shoot Raw don’t you… oh please tell me you don’t just shoot JPEG) and the latest version of Microsoft Image Composite Editor (Yes MICE).  I was a huge fan on ICE from version 1, version 2 just recently released is one of the fastest and most flexible panorama software tools out there. So here are the steps.


Step 1:
Import all the RAW files into Lightroom, then select just one of the photos to act as the master file for processing.
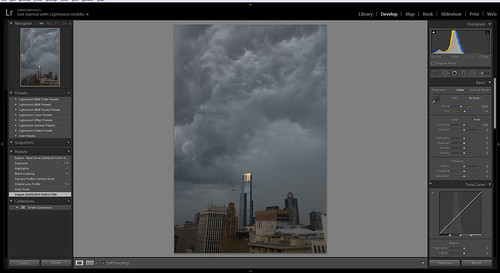
Storm Panorama - Stage 1

Step 2:
Lens Correction, this will fix a world of aliments with any image in one quick go.
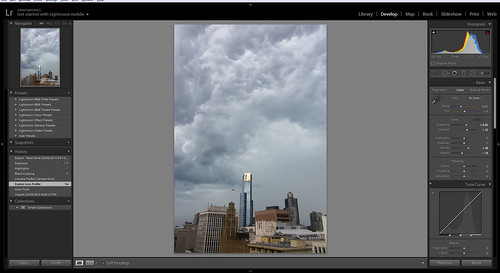
Storm Panorama - Stage 2

Step 3:
In this case, adjusting the profile to Vivid and a tweak on black, highlights and dropping the exposure from auto-tone, which I feel is always to bright and we are done.
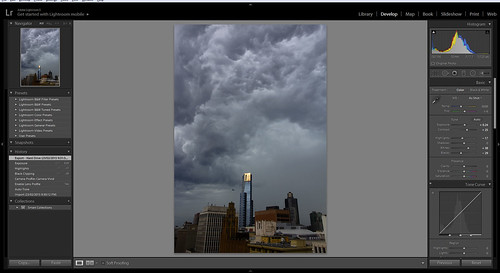
Storm Panorama - Stage 3

Step 4:
Because all the shots were taken with the same manual settings I can just select the rest of the images in my sequence and Sync all the Develop settings.
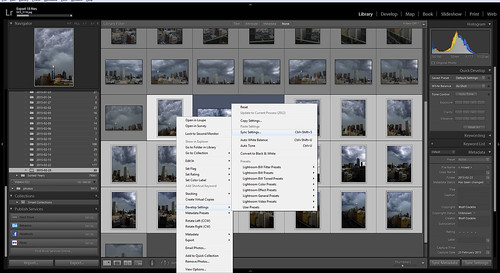
Storm Panorama - Stage 4

Step 5:
Export out, not just low res versions, but the full 300 DPI versions. Then launch Microsoft ICE and import all the images in one batch.
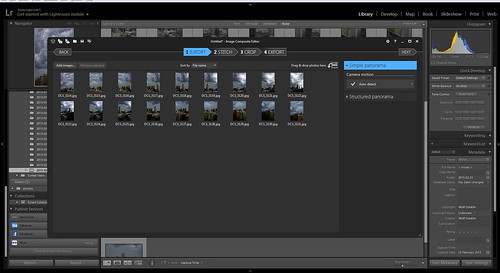
Storm Panorama - Stage 5

Step 6:
Play with the motion that works best for your panorama, unlike Photoshop, ICE shows you in real-time what your pano will look like, sometimes the default isn’t the effect you want.
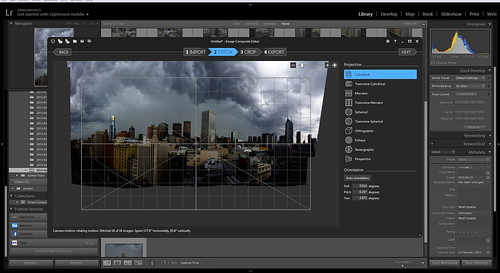
Storm Panorama - Stage 6

Step 7:
Tweak the Crop, ICE version 2 now does the Photoshop trick of “Content Aware” fills as well which can help.
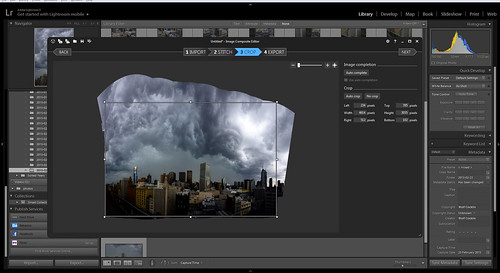
Storm Panorama - Stage 7

Step 8:
Export out the biggest version you can. No point stuffing around with little JPEG’s… in this case I was starting with 150mb of RAW files.
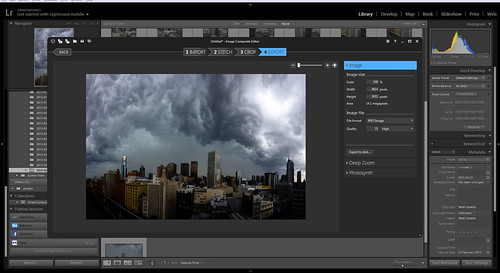
Storm Panorama - Stage 8

Step 9:
Hello LightRoom again. Save the image from ICE back into the folder you imported the images into LightRoom. Once done, open LightRoom, right click on that folder and choose “Synchronise Folder” and hey presto there is your image. Now tweak away. In this case you can see I played with cropping, angle, lens correction and distortion.
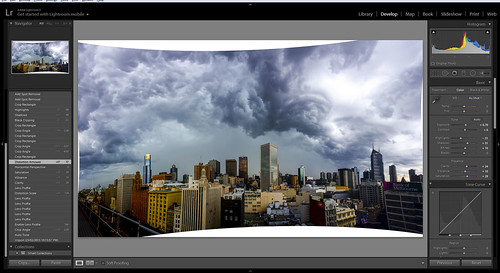
Storm Panorama - Stage 9

Step 10:
Sit back and marvel at your creation.
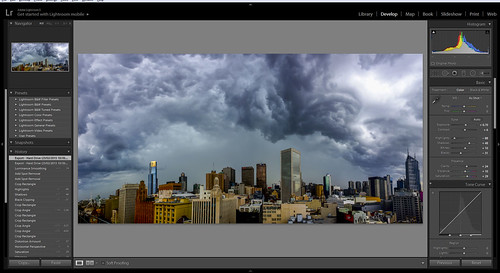
Storm Panorama - Stage 10

Step 11:
Buy this image because it would look great on your wall and I need to buy more camera gear.
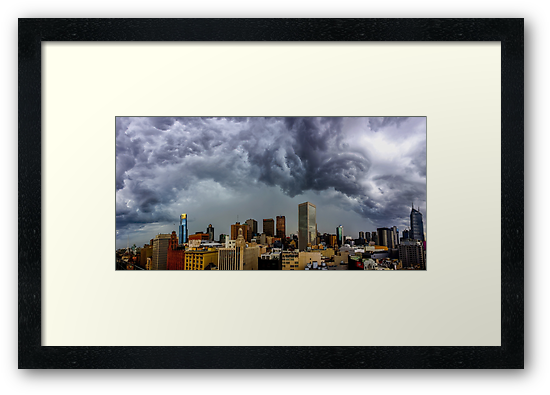
Or a coffee mug, pillow, or laptop or phone case 🙂

And if you want to see what the storm looked like rolling in…


Did you check point 11…. just asking, as I really do want more camera gear.


Behind the Exif: From meh to wow thanks to Lightroom.

I’ve made no secret of my love of shooting with my Nikon, my love of my Tokina 11-16mm, nor my love of Lightroom. So we can move past that mutual appreciation society and cut to the chase.

Running short of time, between moving from work to meet Mrs Wolfcat and the Cubs, I spotted a pretty sunset.  Of course, like any good photographer I had my camera and not just my phone on me, so I fired off a couple of shots.  In Auto-mode the camera just didn’t balance how I wanted, the sky just blew out the shot.  So quick flick to manual mode and start shooting.

The first shots got the sky closer to what I wanted, and the foreground element, but not the middle ground subject matter.  Never mind I said to myself.  Lightroom will be my friend when I get home.

So here is the process…
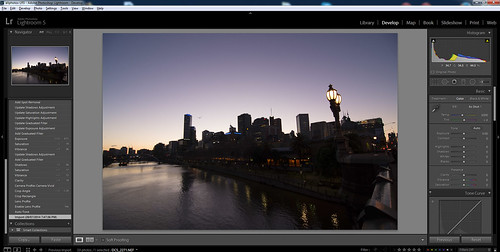
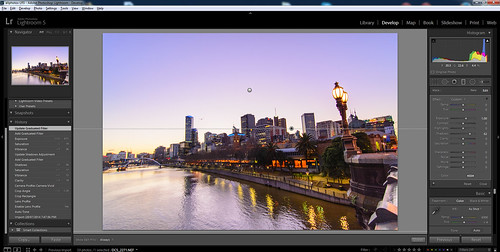
Stage 1 – Import – This is the Raw shot.
Stage 1

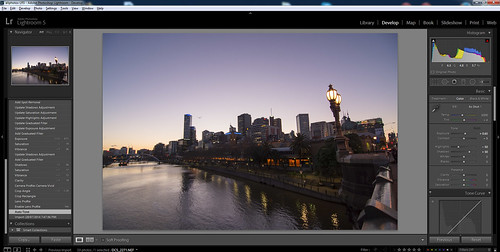
Stage 2 – Auto Tone ( to see what it does, never a final, always a starting point )
Stage 2

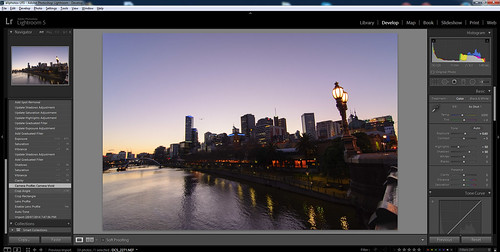
Stage 3/4 – Lens Correction and Camera Profile ( in this case Vivid )
Stage 4

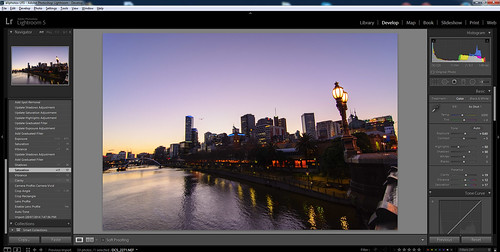
Stage 5 – Saturation and Vibrance ( I want the colours to sing )
Stage 5

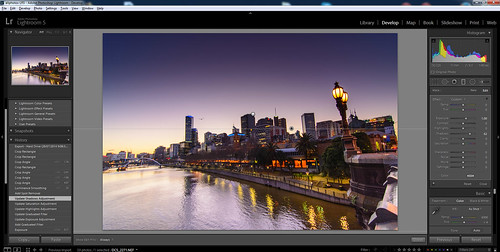
Stage 6 – Bottom Graduated Filter ( to bring up the shadows in the bottom and foreground elements )
Stage 6

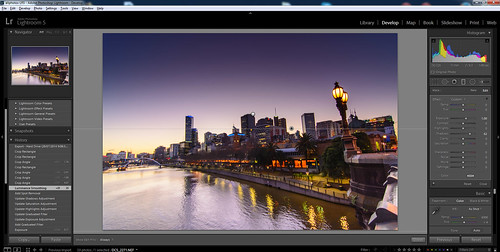
Stage 7/8 – Top Graduated Filter ( Drop back the sky and introduce some shadows and contrast )
Stage 8

Stage 9 – Spot Removal ( in this case the bird, that wasn’t sharp at the shutter speed )
Stage 9

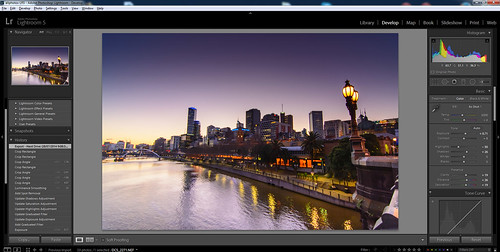
Stage 10 – Stuff around with Crop Angles… and export.
Stage 10


EXIF Data:

  • NIKON D7100
  • ISO Speed – 320
  • Date and Time (Original) –2014:07:28 17:43:00
  • Exposure Mode – Manual
  • White Balance – Auto
  • Focal Length (35mm format) – 16 mm
  • Scene Capture Type – Standard
  • Gain Control – None
  • Contrast – Normal
  • Saturation – Normal
  • Sharpness – Normal
  • Lens Model – Tokina 11.0-16.0 mm f/F2.8


This image is available to buy at both Redbubble and at 500px ( where it can be licensed as well )


Buy the print on Redbubble.

 
See the funny thing is, I would like to do more photography, but raising kids and camera gear don’t go hand in hand, so you really do need to buy my prints 🙂
 

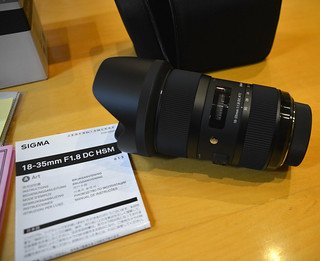
Sigma 18-35mm F/1.8 Nikon Mount – My First Review.

My new Sigma 18-35mm f/1.8 DC HSM Art Lens For Nikon Unboxing 4/4

Now I know the Sigma 18-35mm f/1.8 DC HSM Art Lens For Nikon is currently as rare as unicorns at a KKK march, but now I finally have one, and wow.  Imagine the shock of seeing that analogy, and you start to get a feel for this lens.

I have over the years played with a wide variety of lenses and camera bodies, but what Sigma have produced with this lens is nothing short of Jesus walking on water, whilst singing Karaoke to the Pet Shop Boys “Opportunities (Let’s Make Lots of Money)” because with this lens, that is what they are about to do. This despite the lens having an RPP of $799 which is remarkably cheap for what it is. ( When announced rumours placed it at over $1200)

Of course, there is one major issue, firstly to make lots of money they are going to have to ship this lens.  I waited six months for it, and my supplier only got 4 on the day I got mine.  I thought it was an Australian only problem, with us often being last in the pecking order.  However I noticed that there are a lot of other countries complaining about the late delivery of the Nikon mount as well.

This does mean either Sigma had a great prototype that they couldn’t mass manufacture, or they simply didn’t make enough.  Only time will tell which is the answer to this question.

But on to the lens… wow, it is heavy.

Little fingers need little chocolateHeavy and long, to the point that you will end up holding the lens a lot more than you thought you would.  I find my hands supporting the lens, not my D7100 body.  Lucky the ergonomics of the lens are such that this is very comfortable. When you think that a Nikon D7100 is 765g inc battery and the Sigma 18-35mm lens is 810g you start to see why. Even my trusty Tokina 11-16mm F/2.8 is only 548g.  Still it is a light weight to my Sigma 150-500mm which tops the scales at 1910g.  Sure it is under a kilo, what does that matter?  Trust me you will notice it the first time you sling your camera over your shoulder.  Drop it in your camera bag for a few days it will become more than a noticeable edition.

Yet this weight has to be balanced against what the lens does.  I must admit, I am having sad tinges that my Nikkor 50mm F/1.8 is leaving my camera bag as a day to day lens. On a DX body, sure the “75mm” lens is nice, but why do I need it when I have my wide to portrait lens already.

As for shooting with it.  I’ll take my “wow, it is heavy line” and shorten it to “wow”.  It is so sharp, so fast and so suited to the DX format it is a must buy lens for any DX shooter.  With a focal length just shy of 2cm from the end of the lens you can get so close to a subject and yet so wide it is astounding.

Fried TofuThis lens is perfect for shooting my children and I can see it will be a great favourite with the “food bloggers” as well. Yes it is that versatile.  Add to that the constant F/1.8 and you have a low light master as well.

Given I have left this lens on my camera for a week now, I am sure that my camera body and new lens have run off and got married in a secret ceremony that I was unaware was legal in my home state until now.

It is not without its faults.  Leaving aside the shipping/manufacturing issues, there a things to take into account.  Firstly, I just feel the lens hood doesn’t mount as clean as it should.  I find myself taking the petal hood off just fine, but mounting it, seems to take 2 times to get it seated properly.

Another issue is if you don’t have an external flash, you will need to fork out for one.  This lens is so long it will leave a shadow in every shot, even without the lens hood on if you use the pop up flash. ( Not a problem for me, I have the SB700 already 🙂 )

The other issue is that it is so fast, you have to compensate for it.  I have a lot of shots of fast moving objects where the lens and camera go, oh you want us to focus on that, na, we wont.  A bit of that is user error and a lot of that is getting used to it as well.

Of course if Sigma had made an 11-500mm F/1.8 lens I would buy it, but given it would weigh more than my car, I see there maybe a few issues here.  I still have my Tokina for Ultra wide shots, but this lens is already my go to lens for a wide variety of photos.

Nikkor, Sigma has thrown down a gauntlet, told you “you have been served’, and “ow that burns” as a comment.  I love your cameras, but Nikon, sorry, this is how you make and sell a great lens.

My recommendation is if you are a DX shooter, buy this lens, just don’t expect it in a hurry.

Now to get my hands on some of the other Sigma Art Series Lenses, if they are as good as this, they will be fantastic.


And here is my Flickr Set for the Sigma 18-35mm Lens.

Technical Specs: ( Via sigma.com )

Lens Construction 17 Elements in 12 Groups
Angle of View (SD1) 76.5º-44.2º
Number of Diaphragm Blades 9
Mininum Aperture f16
Minimum Focusing Distance 28 cm
Filter Size (mm) 72mm
Maximum Magnifications 1:4.3
Dimensions
(Diameter x Length)
78mm x 121.0mm
Weight 810grams


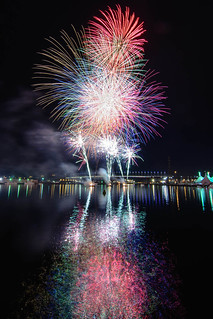
Missing from the EXIF: Docklands Fireworks

Docklands Fireworks 1/4It has been a while since I did one of these posts, actually it has been a while since I did any camera related posts to be honest, but twins do that to you.  Since the last post, there has been one small change, I can haz new camera.  Why yes, I have a new D7100, and wow am I loving it.  ( but that is another post )

First real get out and shoot something opportunity came a week and a day after I purchased the D7100, the Docklands Winter Fireworks.  I was going for the day after I purchased the camera, but #manflu got in the way.  Which is not a bad thing on reflection, as I had another week to play and get used to the camera.

This was my first set of long exposures taken with the D7100, and my trusty Tokina 11-16mm lens.

The biggest advantage of the Docklands fireworks is that you get more than one opportunity.  Last year they were only on in July, this year, they are on in July and August so I have a few more chances to get the shot right.  Although after this shot, I may just stay home on the next few Friday nights.

Of course I got there nice and early, got my gear set up and fired off a few test shots.  Then as is often the case, the environment changed.  Someone decided to put some extra lights on the wharf.  These lights ended up as massive lens flares in every test shot.  So I had 10 minutes to move to a new location before the show began.

Being a fan of the interval timer mode, I had test shots to check for lighting and referencing last years shots I knew the basic F stop and Exposure settings I was after anyway.  So click click click goes the camera.  Just near the end of the show I think, wow check out the reflection and quickly rotate the D7100 into portrait mode.  And bang there is the shot.

Someone on Twitter asked me what settings I had used, well here they all are, and all the tweaks I did in Lightroom.  Tweaks that took me less than two min. As I say got to love shooting RAW ( and oh yeah 6000×4000 300dpi from the D7100 does give me some wiggle room for crops )

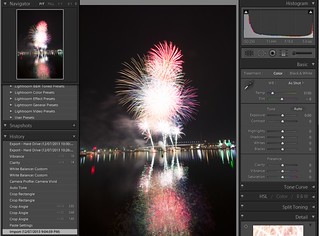
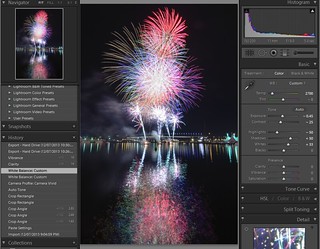
Stage 1 – Import the RAW – The Image as is off the camera
Docklands Fireworks - Lightroom - Stage 1

Stage 2
fix the angles and lens correction, then auto tone
Docklands Fireworks - Lightroom - Stage 2


Stage 3

Tweak the White Balance to get the colours correct
Docklands Fireworks - Lightroom - Stage 3


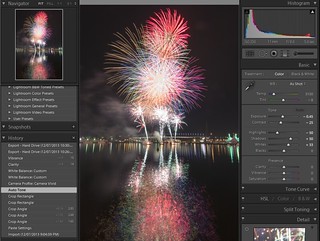
Stage 4

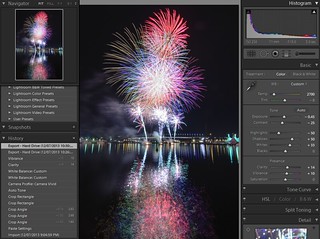
Final tweet to Vibrance and Clarity and then hit export… time in lightroom, less than 2 min.
Docklands Fireworks - Lightroom - Stage 4


The EXIF Info:

Camera Nikon D7100
Exposure 5 Seconds
Aperture f/9.0
Focal Length 11 mm
ISO Speed 250
Exposure Bias 0 EV
Flash Off, Did not fire
Software Adobe Photoshop Lightroom 4.4 (Windows)
Exposure Program Manual
Date and Time (Original) 2013:07:12 19:15:34
Exposure Mode Manual
White Balance Auto
Lens Info 11-16mm f/2.8
Date Created 2013:07:12
Time Created 19:15:34
Creator Tool Adobe Photoshop Lightroom 4.4 (Windows)
Image Number 830


and of course you can purchase this print:

From Redbubble as a print, postcard, framed or poster

and also from 500PX as a canvas print, or you can vote for it.

Missing from the EXIF: Electric Melbourne

Electric Melbourne

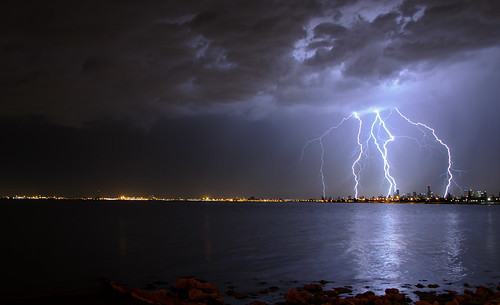
Wow, I finally got the lightning shot I’ve been hunting.  By finally, I mean after 5 years of owning a Digital SLR.

This of shot of course was not without a bucket load of luck.  Luck in the form of the following, lightning at the right time, not raining at the time, not windy at the time, the #wolfcatcubs down and asleep, and that is just for starters.

Taken at my favourite location at the end of North Road, I was chasing a certain storm cell I had seen on radar 30 min before. A cell that hit Ballart hard with hail and severe winds causing a lot of damage as well.

Setting up in my fav location, phone in hand with WeatherzonePro+hooked up to my Weatherzone Pro account I could track the storm cells and lightning as well.  The first batch of photos were shots chasing the cell which passed near Geelong.  Whilst I managed to get a few strikes on camera they just weren’t that “photogenic“.

Checking the radar told me to wait a bit longer, whilst a few drops of rain had fallen, I knew it wasn’t going to rain hard for a while yet.

I repositioned the camera to focus on a potential cell over the city.  Whilst visible on radar, it wasn’t to the naked eye. I had the intervalometer mode enabled on the D7000, shooting an 8second exposure every 9 seconds.  At which point a lot of luck came into play.  A lightning strike lasts for less than a second, so I had the camera shooting for exposures which would have been to dark for ordinary use, but to compensate for the bright flash that lightning would produce.

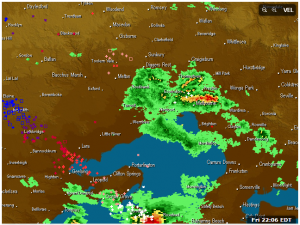
I had joked with some people at the location, what I was after was a couple of bolts dropping just over the CBD, for that magic shot.  My joke came true. As you can see in the radar capture from the time, my location was in a hook in the rain, even more luck.

I took over 100 shots that night at one location.  But this shot is a one shot wonder, all of these strikes are as you see in one shot.  Often people merge multiple lightning strikes into one image, this is an in camera image, which is how I prefer to shoot.

The corrections in lightroom were a small crop, lens correction and a slight push to black levels, nothing more. Whilst I could have corrected the white balance, the blue cast adds to the image in my opinion.

I hope you enjoy this shot as much as I did.

Please support my camera habit by buying this image by click on it below.

The EXIF Info:

Camera Nikon D7000
Exposure 8seconds
Aperture f/7.1
Focal Length 18 mm
ISO Speed 200
Exposure Bias 0 EV
Flash Off, Did not fire
Software AdobePhotoshopLightroom4.2 (Windows)
Date and Time (Modified) 2012:11:30 22:55:20
Exposure Program Manual
Focal Length (35mm format) 27 mm
Lens Model 18.0-105.0 mm f/3.5-5.6
GPS Latitude 37 deg 53′ 53.81″ S
GPS Longitude 144 deg 59′ 5.63″ E
GPS Altitude Ref Above Sea Level
GPS Altitude 16 m
GPS Satellites 10


Vale Peter Giafis – A true Gentleman and a Mentor

It was very sad to learn late last night that Peter Giafis had passed away.  Peter was an institution in the ABC at Southbank Melbourne, always with one of his Nikon’s over his shoulder.

For my last few years at ABC Southbank Peter was someone I looked up to ( and not just because he was tall ), but for his help, guidance and amazing knowledge of photography.  Knowledge that he shared so willingly with all those that asked. I am a better photographer than I could have ever been thanks to his guidance and support.

His curiosity about cameras and photography helped shaped my photography is many ways.  His quiet nature in taking “the” shot and how he blended into the background is a skill I struggle to master. His use of light and subject have lead to many photos that recorded history in not just the ABC, but around Australia.

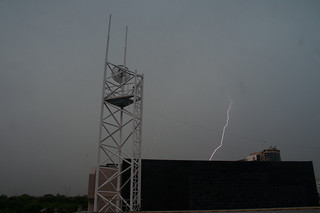
Lighting at SouthbankI will always have fond memories of chasing lightning photos with Peter on the roof of the Southbank building, discussing the latest in Nikon gear and which lens to use for which purpose. Sharing what I had shot with him over the weekend to see what I could improve on.

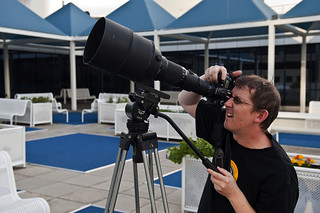
Big lensHis generosity even lent to him bring his prize 600mm F4 lens to work so we could test if the D90 really could run any lens. Which the camera passed in flying colours of course. Even with the Bigma lens, my camera still misses the beauty that was the 600mm lens.

In 2010 it was amazing to be a finalist in the  2010 Getty Images Grab competition along side Peter,  ( Finalists Flickr Link ) and whilst neither of us won, to be shortlisted along side Peter gave me a major confidence boost.

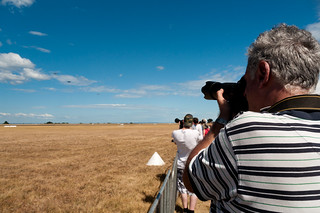
Oh look nikon-itis' shootingAfter I left Aunty I still ran into Peter at a number of events that he was photographing.  I had the pleasure of a whole day with him at the Point Cook airshow early this year. The last time I saw Peter was a discussion just before the Moomba fireworks on the best place to shoot them.
Of course he got the one shot that I missed that day at Point Cook, that killer shot of luck and the real photographers eye, but I still have the daytime lightning shot that he missed.
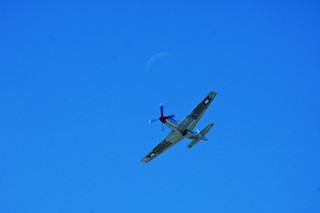
Mustang & Moon

Peter was a true gentleman in every meaning of the word.  The world of photography suffered a loss this week.

My deepest sympathy to those the knew him and to his partner  condolences to his partner Effie Katrakazos.

Vale Peter.
 

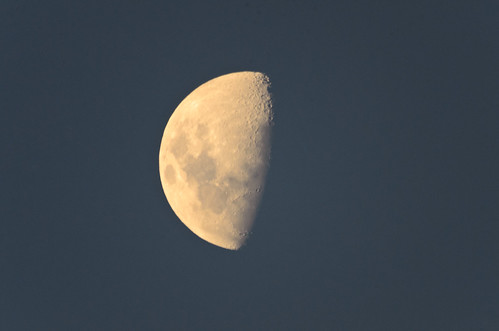
(The photos are in order: ABC photo of Peter, daytime lightning taken at ABC Southbank Vic, Peter’s photo of me with his 600mm lens, Peter at Point Cook this year, and Peters shot of a Mustang with the Moon from Point Cook )


Missing from the EXIF: Dawn

Between a rushed trip to NZ to deal with issues arising from Grandparents moving into a home, to working 5 jobs. Well 1 day job and looking after the #wolfcatcubs and being really crook for the last week, the poor blog has been somewhat lacking in updates.
So here is a quick one, looking at one of the shots from the #wolfcatnz trip.

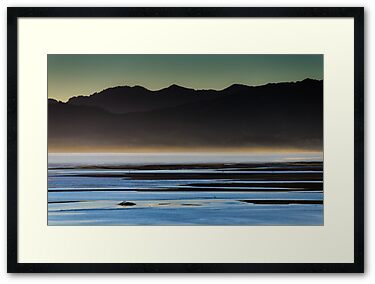
This was Dawn over Golden Bay. I am also more impressed that I was even up that early given the large percentage of a bottle of Bushmill’s Black Bush that my Grandfather and I manged to drink the night before.

Given my lack of predilection to being up at this hour, the shot was taken in Auto No Flash Mode.

The following are the screen shots for the “Developing” I did in Lightroom 3.6.

This was about 5 min of work in total.

( Each of these images opens in a new window to Flickr, where you can view the full size screen grab )

As with most of my photography, I’d like to give a big shout out to the location for making the shot possible.

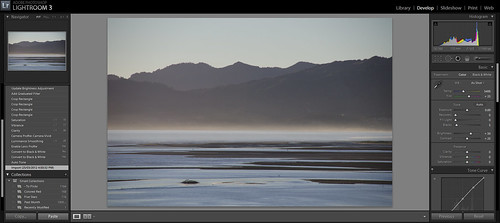
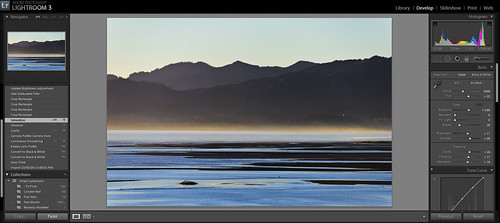
Stage 1 – The Raw File
Lightroom Edits - Dawn Stage 1

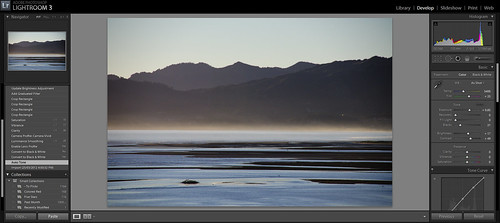
Stage 2
– Auto Tone ( can be handy to see what needs to be corrected, although I find it tends to over expose to my taste )

Lightroom Edits - Dawn Stage 2

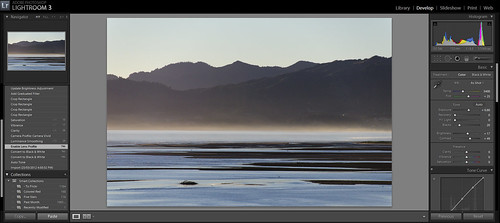
Stage 3 – Lens Correction.  Having these built in saves so much time.  In this case, it was for my good old Sigma 18-200mm.

Lightroom Edits - Dawn Stage 3

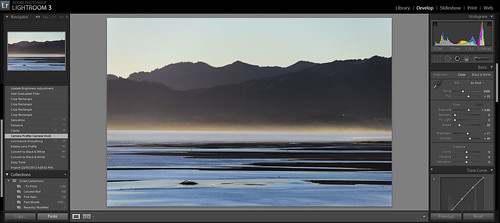
Stage 4 – Camera Profile – Vivid.  To bring out the richness of the tones I was looking for in the image. ( ah shooting Raw I do love thee )

Lightroom Edits - Dawn Stage 4

Stage 5 – Clarity/Saturation/Vibrance – Tweeks to make the image sing that little bit more.

Lightroom Edits - Dawn Stage 5

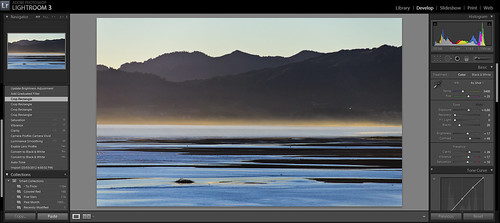
Stage 6 – The all important crop.  Bring the image down to where I wanted it.  Not so top heavy for starters.

Lightroom Edits - Dawn Stage 6

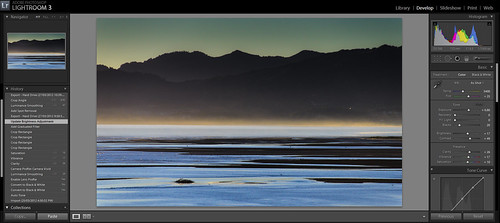
Stage 7
– Graduated Filter. With the sun quite high in the sky and focal points being on the shadowed hills, the sky was a touch over blown.  ( and while yes a set of Grad Filters is on my to buy list, I don’t have them yet. )

Lightroom Edits - Dawn Stage 7

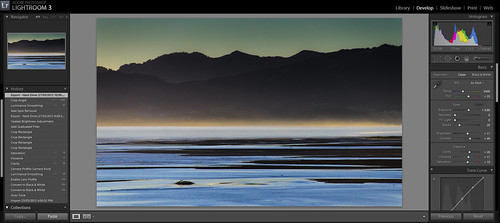
Stage 8 – I often refer to this stage as the … oh didn’t see that till I uploaded it to Flickr Stage.  In this case, Stage 8 involved a small correction to the crop angle and I removed one spot of reflection from a building.  When looking at the image large, the sun hotspot reflection draws your eye in the wrong direction.

Lightroom Edits - Dawn Stage 8

I hope you are as happy with the final image as I am.  Five min in lightroom can be well worth your time.

And the EXIF Data.

Camera Nikon D7000
Exposure 0.001 sec (1/1000)
Aperture f/6.0
Focal Length 155 mm
ISO Speed 560
Exposure Bias 0 EV
Software Adobe Photoshop Lightroom 3.6 (Windows)
Exposure Program Auto No Flash
Date and Time (Original) 2012:03:23 06:06:38
Date and Time (Digitized) 2012:03:23 06:06:38
Max Aperture Value 5.9
Subject Distance 4294967295 m
Lens Info 18-200mm f/3.5-6.3
GPS Version ID 2.3.0.0
GPS Latitude 40 deg 48′ 34.12″ S
GPS Longitude 172 deg 47′ 26.59″ E
GPS Altitude Ref Above Sea Level
GPS Altitude 34 m
GPS Time Stamp 19:06:37
GPS Satellites 11
Creator Tool Adobe Photoshop Lightroom 3.6 (Windows)
Metadata Date 2012:03:27 21:58:40+11:00
Lens 18.0-200.0 mm f/3.5-6.3
History Parameters converted from image/x-nikon-nef to image/jpeg, saved to new location

And of course… Here is what the Framed version looks like if you were to buy it via RedBubble ( go on click it…. 🙂 🙂 )

1000mm Focal Length Test Shots – Kenko 2x Teleplus Pro 300 DGX and a Sigma 150-500mm.

So I ended up choosing to get a Kenko 2x Teleplus Pro 300 DGX for my latest camera toy.

A few quick impressions.  Yes the Sigma 150-500mm will try and auto-focus with this converter…. but and it is a big one.. it won’t be very successful.  In bright light you can get focus but it requires a tripod and a lot of luck at the long end of the range.  So you are better off switching to manual focus.  In fully auto mode I found the d7000 tended to over compensate for the F stop which pushed out to f13 at 500mm, and so the ISO jumps to 1600.  So, once again push to manual. Even my Nikkor 18-105mm does autofocus with this teleconverter.

It is going to take me a while to get the hang of this new teleconverter, but first impressions they say are the ones that count.  My impressions are nice.  Yes images aren’t as sharp, there are issues with focus.  But the EXIF data is all correct, the Kenko works with my Sigma perfectly.

Part of the major issue with focus is that most of my lenses don’t hard stop at infinity.  Which means looking through the view finder to get the image as sharp as possible. Quiet hard to do when a mm movement will reduce sharpness dramatically.

And if you have ANY dust devils on your sensor… you will notice them straight away.  I am going to have to get the D7000 cleaned before the Point Cook Airshow, at f13 the shots are full of dust.

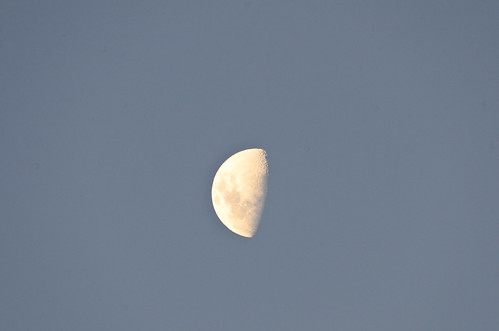
So here are two moon shots the settings in camera and are copied from one shot to the other in lightroom3 so are identical. These are the uncropped versions, click on the images for the bigger versions on Flickr. ( But I did do a dust clean up on them )

The Moon at 500mm
The Moon - 500mm Test Shot


The Moon at 1000mm
The Moon - 1000mm Test Shot

The Set up:

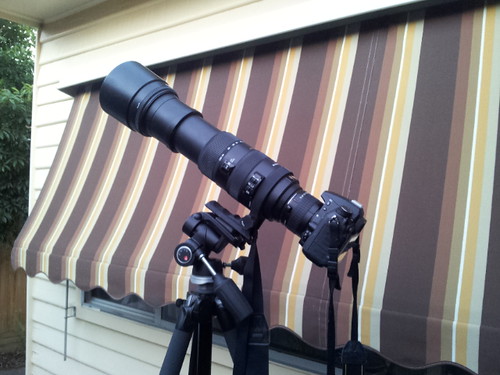
Nikon D7000 with Sigma 150-500mm and Kenko 2x converter

Enjoy.

( See also 11mm to 1000mm a slideshow showing shots from one location zooming in on the complete focal range I have access to. )

This shot is from 8.5km away…
Lens-1000mm

What should be my next camera toy?

Finally getting some more money from all those kind folks that have purchased stuff from my Redbubble Account.

Due to the Wolfcatcubs currently (and for the next 30+ years I think) Redbubble is the only money that I have to spend on new toys for the camera. ( Hint hint hint )  Of course in the last few days I have no offers on my $5999 print, so no new d4 for me, but I will have about $400 to spend in the next few weeks.

With so many toys I still NEED, I thought I would put out my list of possibles and see what others think.

I could get one of the following… to go with a Nikon 90 and D7000

  • AF-S DX Micro Nikkor 40mm f/2.8G
  • Cokin U960 Z-Pro Graduated Neutral Density Kit
  • or either the 1.4 or 2x Teleconverter for my Sigma 150-500mm

of course I’d like all of these… but you can’t have it all can you.

Perhaps there is something else in the ballpark that I really should get?

Thoughts below please…


update: brought a Kenko Teleplus Pro 300 2x Converter.


This Photo is worth $USD5̶9̶9̶9̶ RRP ( Now $USD 3300 RRP ) – Update -2 NOW $2,100

Now, regular followers of mine on Twitter and this blog know that I am a keen amateur photographer.

But that is not to say I will just give away my work.

In light of a number of recent posts people have done about “free” photography and the real cost of getting some of these shots, I have done some thinking around commercial use of my photography. I have decided in no way related to the announcement last week of the Nikon D4 that the shot below is worth USD $5999 RRP. (for the autographed version ( Limited edition of 1 ))

—  Update —

In NO way related to the announcement of the Nikon D800e today… none what so ever… I have decided that this image is on sale at USD $3300

—-

—  Update  2 —

Well well, what would you know… I still haven’t sold it, but in no way related to the just announced Nikon D600 Full Frame DSLR I have now decided that this image is worth$2100.  A bargin if ever there was one. Think of me as one of those closing down rug stores.

—–


Monstering Melbourne

I could tell you about how much the camera cost, the lens, the tripod, the fuel for the car to get to the location, the time and planning to get the shot, the years of waiting for just the right moment, the software and computer equipment to process the shot.

I could point out how this has a lot more going for it that a shot of a field ( even if that shot is 3meters across ) and is dramatically cheaper.

I could say how people want to just use my shot and give me credit for it in the hope that it gives me more publicity…

I could just tell you about the new Nikon D4 and how cool that camera sounds.

( Excuse me whilst I wipe drool up from my keyboard )

Completely unrelated to the last statement I promise….. this shot is now worth the same as the Nikon D4….

and all the details on when and how this shot was taken are in my Missing from the EXIF blog post

or you can buy it Redbubble but that version is unsigned…

The $5999 $3300 $2100 version will be signed. Perhaps it is my signature that is worth the most money after all.


Update:

ok.. really the just confirmed D600 is best suited to my style of photography…  24megapixel FX with 10megapixel DX for my DX lenses…  drool…..

Just think what I could do….