Entries Tagged as 'Redbubble'

Missing from the EXIF: Electric Melbourne

Electric Melbourne

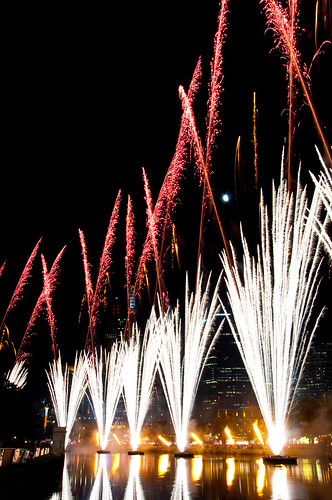
Wow, I finally got the lightning shot I’ve been hunting.  By finally, I mean after 5 years of owning a Digital SLR.

This of shot of course was not without a bucket load of luck.  Luck in the form of the following, lightning at the right time, not raining at the time, not windy at the time, the #wolfcatcubs down and asleep, and that is just for starters.

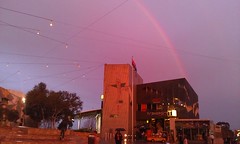
Taken at my favourite location at the end of North Road, I was chasing a certain storm cell I had seen on radar 30 min before. A cell that hit Ballart hard with hail and severe winds causing a lot of damage as well.

Setting up in my fav location, phone in hand with WeatherzonePro+hooked up to my Weatherzone Pro account I could track the storm cells and lightning as well.  The first batch of photos were shots chasing the cell which passed near Geelong.  Whilst I managed to get a few strikes on camera they just weren’t that “photogenic“.

Checking the radar told me to wait a bit longer, whilst a few drops of rain had fallen, I knew it wasn’t going to rain hard for a while yet.

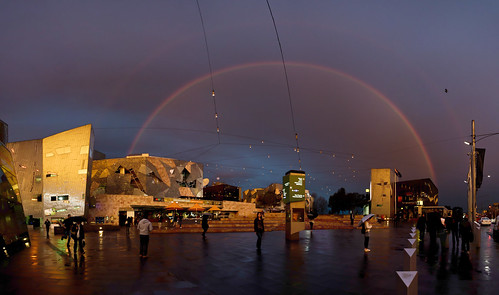
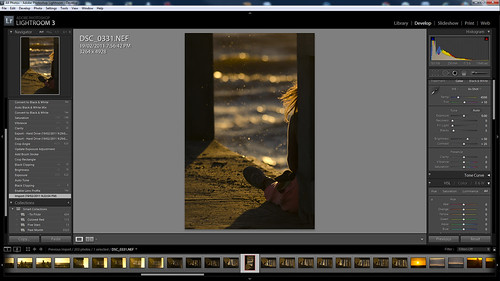
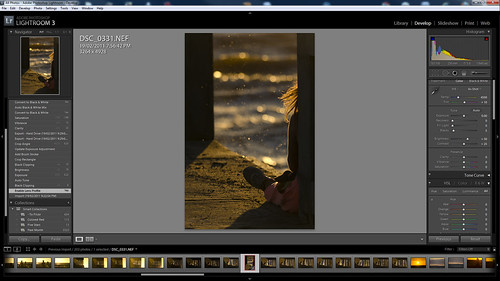
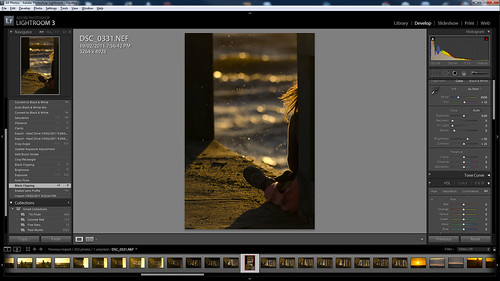
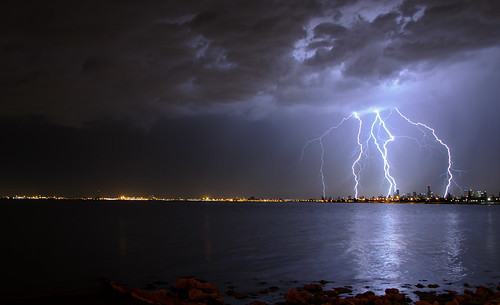
I repositioned the camera to focus on a potential cell over the city.  Whilst visible on radar, it wasn’t to the naked eye. I had the intervalometer mode enabled on the D7000, shooting an 8second exposure every 9 seconds.  At which point a lot of luck came into play.  A lightning strike lasts for less than a second, so I had the camera shooting for exposures which would have been to dark for ordinary use, but to compensate for the bright flash that lightning would produce.

I had joked with some people at the location, what I was after was a couple of bolts dropping just over the CBD, for that magic shot.  My joke came true. As you can see in the radar capture from the time, my location was in a hook in the rain, even more luck.

I took over 100 shots that night at one location.  But this shot is a one shot wonder, all of these strikes are as you see in one shot.  Often people merge multiple lightning strikes into one image, this is an in camera image, which is how I prefer to shoot.

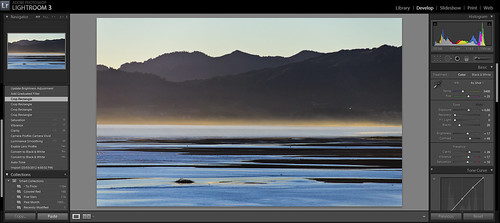
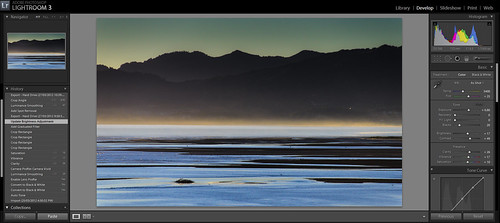
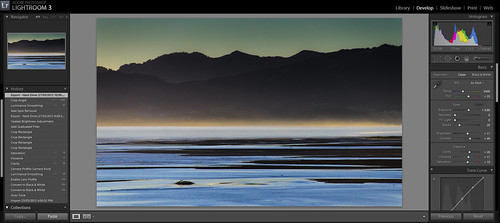
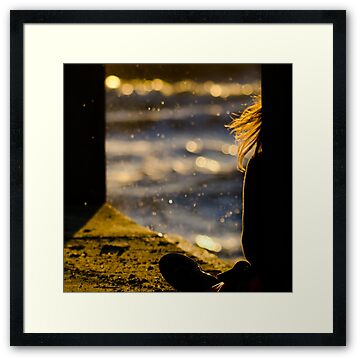
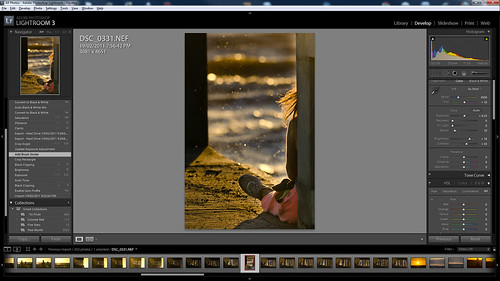
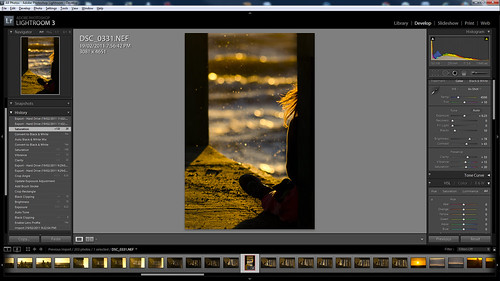
The corrections in lightroom were a small crop, lens correction and a slight push to black levels, nothing more. Whilst I could have corrected the white balance, the blue cast adds to the image in my opinion.

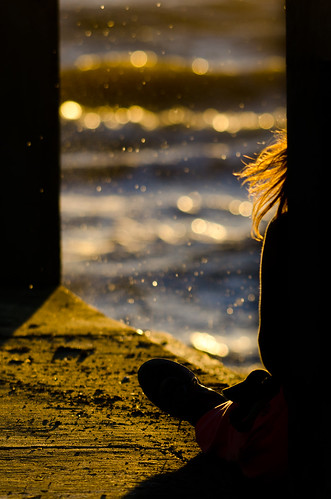
I hope you enjoy this shot as much as I did.

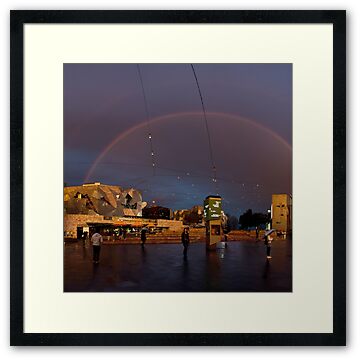
Please support my camera habit by buying this image by click on it below.

The EXIF Info:

Camera Nikon D7000
Exposure 8seconds
Aperture f/7.1
Focal Length 18 mm
ISO Speed 200
Exposure Bias 0 EV
Flash Off, Did not fire
Software AdobePhotoshopLightroom4.2 (Windows)
Date and Time (Modified) 2012:11:30 22:55:20
Exposure Program Manual
Focal Length (35mm format) 27 mm
Lens Model 18.0-105.0 mm f/3.5-5.6
GPS Latitude 37 deg 53′ 53.81″ S
GPS Longitude 144 deg 59′ 5.63″ E
GPS Altitude Ref Above Sea Level
GPS Altitude 16 m
GPS Satellites 10


Missing from the EXIF: Dawn

Between a rushed trip to NZ to deal with issues arising from Grandparents moving into a home, to working 5 jobs. Well 1 day job and looking after the #wolfcatcubs and being really crook for the last week, the poor blog has been somewhat lacking in updates.

So here is a quick one, looking at one of the shots from the #wolfcatnz trip.

This was Dawn over Golden Bay. I am also more impressed that I was even up that early given the large percentage of a bottle of Bushmill’s Black Bush that my Grandfather and I manged to drink the night before.

Given my lack of predilection to being up at this hour, the shot was taken in Auto No Flash Mode.

The following are the screen shots for the “Developing” I did in Lightroom 3.6.

This was about 5 min of work in total.

( Each of these images opens in a new window to Flickr, where you can view the full size screen grab )

As with most of my photography, I’d like to give a big shout out to the location for making the shot possible.

Stage 1 – The Raw File
Lightroom Edits - Dawn Stage 1

Stage 2
– Auto Tone ( can be handy to see what needs to be corrected, although I find it tends to over expose to my taste )

Lightroom Edits - Dawn Stage 2

Stage 3 – Lens Correction.  Having these built in saves so much time.  In this case, it was for my good old Sigma 18-200mm.

Lightroom Edits - Dawn Stage 3

Stage 4 – Camera Profile – Vivid.  To bring out the richness of the tones I was looking for in the image. ( ah shooting Raw I do love thee )

Lightroom Edits - Dawn Stage 4

Stage 5 – Clarity/Saturation/Vibrance – Tweeks to make the image sing that little bit more.

Lightroom Edits - Dawn Stage 5

Stage 6 – The all important crop.  Bring the image down to where I wanted it.  Not so top heavy for starters.

Lightroom Edits - Dawn Stage 6

Stage 7
– Graduated Filter. With the sun quite high in the sky and focal points being on the shadowed hills, the sky was a touch over blown.  ( and while yes a set of Grad Filters is on my to buy list, I don’t have them yet. )

Lightroom Edits - Dawn Stage 7

Stage 8 – I often refer to this stage as the … oh didn’t see that till I uploaded it to Flickr Stage.  In this case, Stage 8 involved a small correction to the crop angle and I removed one spot of reflection from a building.  When looking at the image large, the sun hotspot reflection draws your eye in the wrong direction.

Lightroom Edits - Dawn Stage 8

I hope you are as happy with the final image as I am.  Five min in lightroom can be well worth your time.

And the EXIF Data.

Camera Nikon D7000
Exposure 0.001 sec (1/1000)
Aperture f/6.0
Focal Length 155 mm
ISO Speed 560
Exposure Bias 0 EV
Software Adobe Photoshop Lightroom 3.6 (Windows)
Exposure Program Auto No Flash
Date and Time (Original) 2012:03:23 06:06:38
Date and Time (Digitized) 2012:03:23 06:06:38
Max Aperture Value 5.9
Subject Distance 4294967295 m
Lens Info 18-200mm f/3.5-6.3
GPS Version ID 2.3.0.0
GPS Latitude 40 deg 48′ 34.12″ S
GPS Longitude 172 deg 47′ 26.59″ E
GPS Altitude Ref Above Sea Level
GPS Altitude 34 m
GPS Time Stamp 19:06:37
GPS Satellites 11
Creator Tool Adobe Photoshop Lightroom 3.6 (Windows)
Metadata Date 2012:03:27 21:58:40+11:00
Lens 18.0-200.0 mm f/3.5-6.3
History Parameters converted from image/x-nikon-nef to image/jpeg, saved to new location

And of course… Here is what the Framed version looks like if you were to buy it via RedBubble ( go on click it…. 🙂 🙂 )

This Photo is worth $USD5̶9̶9̶9̶ RRP ( Now $USD 3300 RRP ) – Update -2 NOW $2,100

Now, regular followers of mine on Twitter and this blog know that I am a keen amateur photographer.

But that is not to say I will just give away my work.

In light of a number of recent posts people have done about “free” photography and the real cost of getting some of these shots, I have done some thinking around commercial use of my photography. I have decided in no way related to the announcement last week of the Nikon D4 that the shot below is worth USD $5999 RRP. (for the autographed version ( Limited edition of 1 ))

—  Update —

In NO way related to the announcement of the Nikon D800e today… none what so ever… I have decided that this image is on sale at USD $3300

—-

—  Update  2 —

Well well, what would you know… I still haven’t sold it, but in no way related to the just announced Nikon D600 Full Frame DSLR I have now decided that this image is worth$2100.  A bargin if ever there was one. Think of me as one of those closing down rug stores.

—–


Monstering Melbourne

I could tell you about how much the camera cost, the lens, the tripod, the fuel for the car to get to the location, the time and planning to get the shot, the years of waiting for just the right moment, the software and computer equipment to process the shot.

I could point out how this has a lot more going for it that a shot of a field ( even if that shot is 3meters across ) and is dramatically cheaper.

I could say how people want to just use my shot and give me credit for it in the hope that it gives me more publicity…

I could just tell you about the new Nikon D4 and how cool that camera sounds.

( Excuse me whilst I wipe drool up from my keyboard )

Completely unrelated to the last statement I promise….. this shot is now worth the same as the Nikon D4….

and all the details on when and how this shot was taken are in my Missing from the EXIF blog post

or you can buy it Redbubble but that version is unsigned…

The $5999 $3300 $2100 version will be signed. Perhaps it is my signature that is worth the most money after all.


Update:

ok.. really the just confirmed D600 is best suited to my style of photography…  24megapixel FX with 10megapixel DX for my DX lenses…  drool…..

Just think what I could do….


My Top 10 Images that I took in 2011

These are my top 10 images from 2011.  Some are shots that are for sale, others are stories and events.

I’d like to thank all those that encourage my photography over the last 12 months from those that purchased prints, to the countless who RT’d my tweets and left comments here and on Flickr.  And thanks for putting up with all the #wolfcatcubs photos as well.

Hopefully next year I will be able to get out some more… but I doubt it.

Wolf.


In reverse order of date taken.

Now that is a bolt of lightning
Finally got a nice clear bolt of lightning… now if only I had a clear view of the sky…..

Monstering Melbourne
Over 20,000 views makes this my most popular image on flickr.

and all the details on when and how this shot was taken are in my Missing from the EXIF blog post

And for sale at Redbubble


Simplicity
Simplicity
This has a Japanese feel to it for me. Shot from the End of North Road, at 500mm.

And for sale at Redbubble


Dancer
Dancer
Something about this shot sings to me. The simplicity, the story and the power.

And for sale at Redbubble


Mum and Zara
Mum and Zara
Choosing one shot of the #wolfcatcubs was hard, this one for me says it all.


Red and White – Moomba Fireworks
Red and White - Moomba Fireworks
The first time I actually went to Moomba.

And for sale at Redbubble


The Belly of The Beast
After a number of trips to Avalon, I finally got lucky. Not only did I have the right gear, (Nikon D7000 + Sigma 150-500mm Lens) but I got to see this aircraft fly.


Contemplating the day that was
One of the first shots taken with my Sigma 150-500mm. A lens that 12 months later I am still in love with.

Step by Step, showing the Lightroom processing for the the shot here

And for sale at Redbubble


Keep your Cool
Keep your Cool ( B&W Version )
(from one of the only out of the city photo trips I did all year)

And for sale at Redbubble


The long shot… North Road Jetty #nyemelb
Midnight Fireworks in Melbourne #nyemelb

Details and Background about this shot here

And for sale at Redbubble


Xmas Shipping for Wolfcat prints/t-shirts and calendars…

These do make great Xmas presents…  and I can tell you I do eat my own dog food and give t-shirts and calendars as presents to friends and family.

And they have the advantage that you don’t have to leave home and face the increasingly maddening crowds of Xmas shoppers.

Eg…

Prints

Monstering Melbourne Framed Print


T-Shirts

I will take that as comment t-shirt


Calendars

Weather Calendar


And the full of prints/t-shirts/calendars/stickers and lama’s* range can be seen here at my Portfolio

(Note: Lama’s may not be available in your country )

Last Dates for Xmas Shipping ( Non Express )

Standard Shipping Australia US Canda UK/Europe Rest of world
T-Shirts 15 Dec 18 Dec 17 Dec 15 Dec 13 Dec
Posters, matted and mounted prints 17 Dec 13 Dec 13 Dec 17 Dec 12 Dec
Framed and canvas prints, Greeting Cards, Photographic prints, Calendars 17 Dec 17 Dec 17 Dec 17 Dec 12 Dec
17 Dec 17 Dec 17 Dec 17 Dec 12 Dec


and don’t forget that all profit goes to a worthy cause…my camera fund, which has been dramatically curtailed due to the #wolfcatcubs.

Missing from the Exif: Over the Rainbow – Federation Square

We all know that a huge percentage of photos are right time right place.  For me this was even more so yesterday heading home from work.

HTC - Incredible S versionThose that know me know I carry my DSLR camera with me nearly everywhere.  Yesterday proves why.  The best photo is always the one you get with the camera you have.  To that end it is preferable that you have a better camera. So walking through town on my way home mother nature kindly put on a very nice rainbow. ( This shot for example is from my phone)

I had no more than 10min to spend getting shots by which time the rainbow had gone.

I used a Nikon D7000 with the kit 18-105mm lens.  When I could see where the rainbow was facing, I quickly walked up to Fed Square so I had the foreground element I was after.  Rainbows are all very nice, but framing a foreground adds an extra dimension to the shot.  I didn’t have my 11-16mm Tokina on me, so decided to go for the stitch later panorama series of photos.

When shooting panoramas it really helps to move the camera off Auto Mode as well.  This way your shot has even lighting across the whole image.  If you shoot them in auto, you will end with dark and light banding as each shot has a different exposure.  You can if you have time shoot in manual to pull up the dark parts of the shot if you want, but I was racing the setting sun with this one.

This shot had a bit of post processing as well.  Given I was racing time to get all the frames for the panorama as well. In Lightroom all that I did was just apply the lens correction to all of the shots.  This takes out the barrel distortion and vignetting as well making stitching much easier.  Then I exported all the full size images as JPG’s to Microsoft ICE.  I did try Photoshop, but ICE did a much better job of stitching.

Then came the fun part.  Images never look the same on a monitor as they do on the back of the camera.  In this case all of the Fed Square was to dark.  The sky was balanced how I wanted it, but not the people.

In Photoshop I created a Curves adjustment layer, then created a mask for the bottom half of the image. Then I adjusted the curves to help pull out the rich golden tones that I hadn’t pulled up in the raw shots.

Stage 2

All up, about 30 min of processing work for this shot…

I’m a really pleased with the final image and hope you are as well….

Over the rainbow - Federation Square


(P.S Now you can buy it as a large photographic print as well as in a mounted print…. )


Totally prepared for the #wolfcatcubs now…..

Yep… with this new Hoodie I am as prepared as I can be for the #wolfcatcubs

Just as people expect learners on the road to drive badly, I am trying to manage expectations around my ability to be a father.

New Hoodie.... Learner Dad

Get your own here on Redbubble

Missing from the EXIF: Lightroom Tweaks to Contemplating the day that was

So I finally have a Nikon D7000 to play with.  Sadly it is not mine however, and I shall cry myself to sleep for a while over that.

To put the camera through it paces I thought I would head to one of my usual spots, take just the Sigma 150-500mm lens and see what I could get. Whilst looking for shots, I walked back from the jetty a bit and found the perfect composure I was looking for.  I am a big fan of taking photos of people, where you can’t tell who the person is.  If you want to enter shots into competitions for example, they often want release forms for the subject.  Not having the subject identifiable fixes this issue.

I took 18 shots to get this one,whilst it is either the first or last shot that ends up being the keeper, this was in the middle of the series.  I was looking for a breaking wave and the girls hair to be flowing just the right amount. All the while I was kneeling on concrete to get the right angle for the shot as well.

Here is the Final Version of the Image as you can buy it on Redbubble

Each of these images opens into a new tab/window, in Flickr Lightbox mode so you can see all the details.  These are untouched screenshots, so that you can see the whole process I went through. You will notice a few extra steps, where I tried a few things, which didn’t work, then carried on, such as a black and white version. But I haven’t commented on them.

The time frame for this processing was just under 5 min of actual sitting in front of the computer time.

Stage 1: This is the Raw Shot. So, I know I have the composition right, but the colour balance and weighting of the shot isn’t quite what I was after…

contemplate-stage-1

Stage 2: As my Sigma 150-500mm Lens is in the Lens, issues such as barrel distortion, vignetting and chromatic aberration can be fixed in one click.

contemplate-stage-2

Stage 3: I knew I wanted to pull the blacks up in this image, so I did a quick tweak of the black clipping just to see if it was worth progressing with the image processing. Often, once you start processing, with an end result in mind, you will come across images that you just decide not to finish with.

contemplate-stage-3

Stage 4: Ah Autotone… I like you as much as I hate you. It always overblows shots as far as I am concerned. I always end up pulling the shot back, but it can be a good quick fix to a number of issues.

contemplate-stage-4

Stage 5: And yep, the next thing after the autotone, is to pull the exposure back from the +0.65 that Lightroom’s Autotone did, back to +0.23. So some of the image is brought out, but not to much.

contemplate-stage-5

Stage 6: And like Stage 5, this was a tweak to pull the brightness down, so that the image is a lot more muted over all.

contemplate-stage-6

Stage 7: I needed to go back and pull the blacks up a bit more at this point, to push detail out of the shadows that had crept in so that your eyes follow the lines in the image.

contemplate-stage-7

Stage 8: Hand holding a 3kg lens of camera and lens in high winds whilst kneeling on concrete does of course mean your shot is never going to be perfectly straight. This was just a tweak to the rotation to line up the vertical elements.

contemplate-stage-8

Stage 9: This is a two stage process. Firstly using the Brush Stroke tool, I selected the girl, and the pole she was leaning against so that I could apply a filter directly to just those parts of the image. As Lightroom, remembers the last settings, it of course made them over exposed, but it is handy to see the shapes that I was covering.

contemplate-stage-9

Stage 10: Now I just reduce the exposure on the brush tool path, from 1 to -0.88, which drops the colour and the detail from the girl leaving a stronger shadow and removes the distraction of the details of her clothing, but keeps her hair and the rest of the image in balance.

contemplate-stage-10

Stage 11: Once you have finished doing the major changes to the balance of an image, what looked straight before may not look as straight again. So this was to fix the aesthetic straightness of the image.

contemplate-stage-11

Stage 12: In all the above tweaks the golden colour had become a little washed out. So this was just a tweak to the Clarity and Vibrance to pull the image up a bit.

contemplate-stage-12

Stage 13: And to finish off, just a small push to the saturation to ensure the image colour and feel was as rich as I wanted.

contemplate-stage-13

And the Exif Data for the Shot:

Camera Nikon D7000
Exposure 0.002 sec (1/640)
Aperture f/5.6
Focal Length 250 mm
ISO Speed 100
Exposure Bias 0 EV
Flash Off, Did not fire
Date and Time (Modified) 2011:02:19 23:02:36
Exposure Program Shutter speed priority AE
Date and Time (Digitized) 2011:02:19 19:56:42
Max Aperture Value 5.7
Subject Distance 10 m
Metering Mode Multi-segment
Custom Rendered Normal
Exposure Mode Auto
White Balance Auto
Focal Length In35mm Format 375 mm
Scene Capture Type Standard
Gain Control None
Contrast Normal
Saturation Normal
Sharpness Normal
GPS Latitude 37 deg 53′ 28.29″ S
GPS Longitude 144 deg 59′ 6.89″ E
GPS Altitude Ref Above Sea Level
GPS Altitude 2 m
GPS Map Datum WGS-84
Creator Tool Adobe Photoshop Lightroom 3.3
Lens 150.0-500.0 mm f/5.0-6.3
Approximate Focus Distance 10

and the Flickr Version of the Shot…
Contemplating the day that was

I like the old twitter better than your new twitter…

Ok… now that I have murdered song lyrics for a title, I think I have set the tone I was after.

I don’t like the “New” Twitter layout. And the constant reminders that it is going to go… ” our using an older version of Twitter that won’t be around for much longer” fill me with what is in reality a #firstworldproblem kind of dread.

I run a lot of accounts off and on, and yes I am more than familiar with a number of apps and different solutions. I use Seemic on my phone, have used dabr on my old phone, tweetdeck on my computers and even twirl. But I like the simplicity of “Old Twitter”.

With 40k+ tweets, and having been on Twitter since May 2007, I think a: I crap on a lot and b: I am a regular user of the platform. And whilst I see all the benefits of the apps, I like the simplicity that the web interface gives me. Also it means that I am in my primary app for content creation and can just move between windows to share content.

I like the clean nature of the website and that it does just sit into the background, apps demand to much attention and show the flow of information almost to well.  I know every tweet and every link doesn’t need to be read, certainly, not in the same window. If I want the content, I am happy to let it load in another window for example, or just bookmark it for later reading. I like seeing when I have new Direct Messages, not have them hidden in a tool bar.

I like the stability of the old twitter as well. All the bells and whistles just create problems. I move between new and old computers all the time and find that new twitter eats content, breaks media and causes more frustration, ironically leading to me missing more content.

I can see why people do like the new twitter, but I am not one of them.

Given that my original tweet “dear twitter stop threatening to get rid of old twitter or I will write an angry blog post that 5 people might read.” made it to the home page of twitter, was rt by hundreds of people and has got me lots of comments about it, I don’t think I am alone in my thinking.

So I implore you kind folks at twitter, who give me a service that I have not paid 1cent to use, let me have old twitter as an option.

Cheers

@wolfcat.

P.S can you please fix my direct messages count, and whilst you are at it… get rid of the people squatting on twitter handles for more than 12 months.

P.P.S I still like you Twitter, and I still want to be friends with your website.

Missing from the Exif: On the Edge of Night

Sorry for the lack of updates… between a new job and a new lens… hazahh… I’ve not spent much time behind the computer…. So here is a post based around a shot I always wanted and the new lens.

One of my favourite shots of the the setting sun, is the melting on the horizon version.   The one with the full disk of the sun visible through the long light, and just at the point it is touching the horizon, with the extra distortions that the atmosphere gives the shot.

When I first got my Nikon D90 DSLR, it came with an 18-55 and a 55-200mm lens kit.  All very nice, but 200mm still meant I had to crop a lot on the image to get the focal point out of the shots I was taking.  Next was my 70-300mm.  Much better… but still to much cropping on a 12megapixel image to pull the shot I wanted.

Finally I got my Sigma 150-500mm.  For two weeks after I got it, I was running down to the beach at sunset.  And every evening I either had something on at sunset, or as was the main case, a beautiful sunny day would turn cloudy at the last min, or the line of cloud 15degrees above the horizon would still be there.

Now I am lucky I live 10min drive from the water and that the sun sets over Port Phillip Bay in Melbourne for me.  To be honest I am not a morning person, so having to get up at 5am for the shot wasn’t going to happen.

Finally, I get the cloud cover I want, and the major bit of luck the atmosphere I wanted.  It is always hit and miss with sunsets as to what you will get, if the sun will slide cleanly into the water, or play nice optical tricks in that last few min before it sets.  Here I got that balance.

This is a hand held shot, although a tripod for the sunset does make life much easier, even though you have to tweak the position of the camera on the tripod as it will move a few degrees as it sets.

This is a touch of patience and a touch of luck, combined with a 500mm lens.  I hope you like it as much as I do.

On the Edge of Night

The EXIF Data:

Camera Nikon D90
Lens Sigma 150-500mm F5-6.3 APO DG OS
Exposure 1/3200 sec
Aperture f/9.0
Focal Length 500 mm
ISO Speed 160
Exposure Program Manual
Date and Time (Digitized) 2011:01:29 20:34:01
Digital Zoom Ratio 1
Focal Length In35mm Format 750 mm
Scene Capture Type Standard
GPS Altitude Ref Above Sea Level
GPS Altitude 5 m
GPS Date Stamp 2011:01:29
GPS Latitude 37 deg 53′ 54.11″ S
GPS Longitude 144 deg 59′ 4.98″ E

It was also featured on the RedBubble Home Page… ( Click on the link to buy the image )

On the Edge of Night