Entries Tagged as 'Nikon D90'

Vale Peter Giafis – A true Gentleman and a Mentor

It was very sad to learn late last night that Peter Giafis had passed away.  Peter was an institution in the ABC at Southbank Melbourne, always with one of his Nikon’s over his shoulder.

For my last few years at ABC Southbank Peter was someone I looked up to ( and not just because he was tall ), but for his help, guidance and amazing knowledge of photography.  Knowledge that he shared so willingly with all those that asked. I am a better photographer than I could have ever been thanks to his guidance and support.

His curiosity about cameras and photography helped shaped my photography is many ways.  His quiet nature in taking “the” shot and how he blended into the background is a skill I struggle to master. His use of light and subject have lead to many photos that recorded history in not just the ABC, but around Australia.

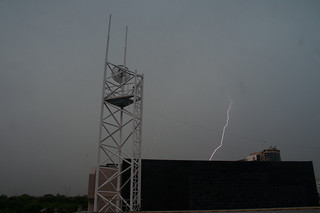
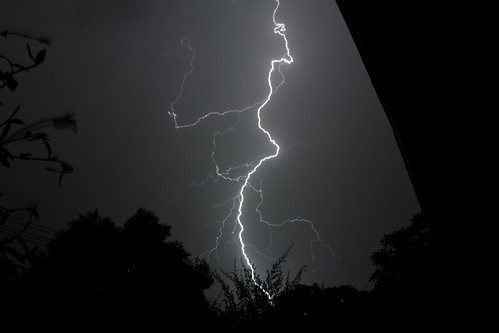
Lighting at SouthbankI will always have fond memories of chasing lightning photos with Peter on the roof of the Southbank building, discussing the latest in Nikon gear and which lens to use for which purpose. Sharing what I had shot with him over the weekend to see what I could improve on.

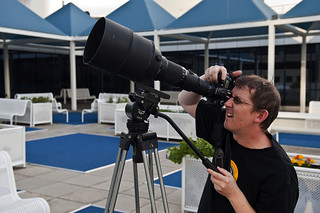
Big lensHis generosity even lent to him bring his prize 600mm F4 lens to work so we could test if the D90 really could run any lens. Which the camera passed in flying colours of course. Even with the Bigma lens, my camera still misses the beauty that was the 600mm lens.

In 2010 it was amazing to be a finalist in the  2010 Getty Images Grab competition along side Peter,  ( Finalists Flickr Link ) and whilst neither of us won, to be shortlisted along side Peter gave me a major confidence boost.

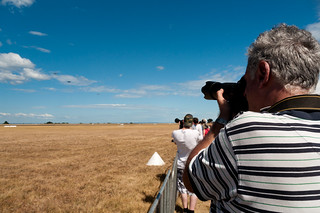
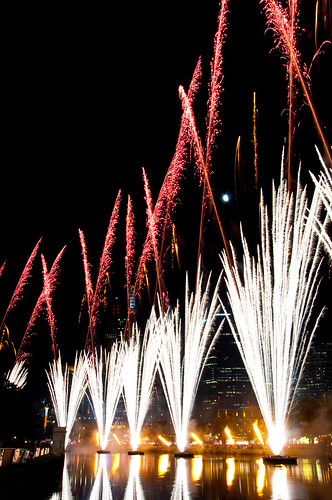
Oh look nikon-itis' shootingAfter I left Aunty I still ran into Peter at a number of events that he was photographing.  I had the pleasure of a whole day with him at the Point Cook airshow early this year. The last time I saw Peter was a discussion just before the Moomba fireworks on the best place to shoot them.

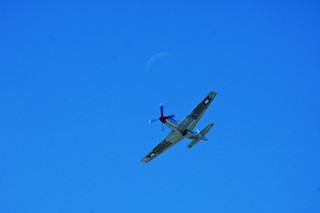
Of course he got the one shot that I missed that day at Point Cook, that killer shot of luck and the real photographers eye, but I still have the daytime lightning shot that he missed.
Mustang & Moon

Peter was a true gentleman in every meaning of the word.  The world of photography suffered a loss this week.

My deepest sympathy to those the knew him and to his partner  condolences to his partner Effie Katrakazos.

Vale Peter.


(The photos are in order: ABC photo of Peter, daytime lightning taken at ABC Southbank Vic, Peter’s photo of me with his 600mm lens, Peter at Point Cook this year, and Peters shot of a Mustang with the Moon from Point Cook )


My Top 10 Images that I took in 2011

These are my top 10 images from 2011.  Some are shots that are for sale, others are stories and events.

I’d like to thank all those that encourage my photography over the last 12 months from those that purchased prints, to the countless who RT’d my tweets and left comments here and on Flickr.  And thanks for putting up with all the #wolfcatcubs photos as well.

Hopefully next year I will be able to get out some more… but I doubt it.

Wolf.


In reverse order of date taken.

Now that is a bolt of lightning
Finally got a nice clear bolt of lightning… now if only I had a clear view of the sky…..

Monstering Melbourne
Over 20,000 views makes this my most popular image on flickr.

and all the details on when and how this shot was taken are in my Missing from the EXIF blog post

And for sale at Redbubble


Simplicity
Simplicity
This has a Japanese feel to it for me. Shot from the End of North Road, at 500mm.

And for sale at Redbubble


Dancer
Dancer
Something about this shot sings to me. The simplicity, the story and the power.

And for sale at Redbubble


Mum and Zara
Mum and Zara
Choosing one shot of the #wolfcatcubs was hard, this one for me says it all.


Red and White – Moomba Fireworks
Red and White - Moomba Fireworks
The first time I actually went to Moomba.

And for sale at Redbubble


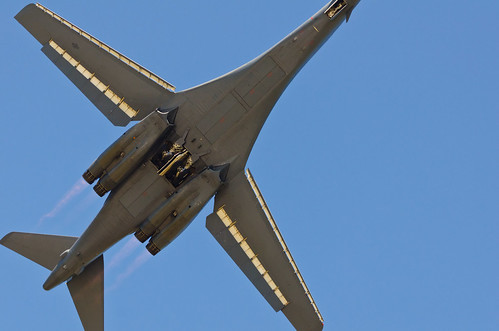
The Belly of The Beast
After a number of trips to Avalon, I finally got lucky. Not only did I have the right gear, (Nikon D7000 + Sigma 150-500mm Lens) but I got to see this aircraft fly.


Contemplating the day that was
One of the first shots taken with my Sigma 150-500mm. A lens that 12 months later I am still in love with.

Step by Step, showing the Lightroom processing for the the shot here

And for sale at Redbubble


Keep your Cool
Keep your Cool ( B&W Version )
(from one of the only out of the city photo trips I did all year)

And for sale at Redbubble


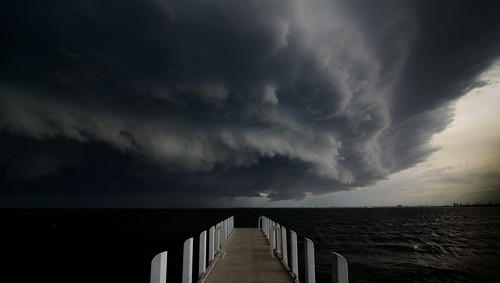
The long shot… North Road Jetty #nyemelb
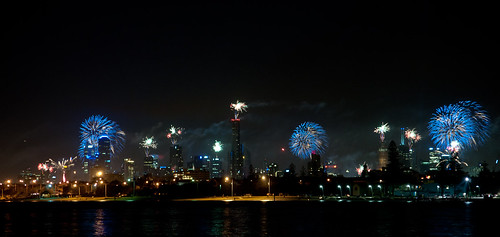
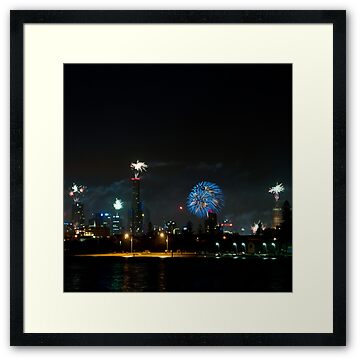
Midnight Fireworks in Melbourne #nyemelb

Details and Background about this shot here

And for sale at Redbubble


At the End of North Road (A flickr set)

Thought I would set up a Flickr Set for my fav place to go and get photos. The North Road Foreshore Park, Brighton. Having got a few in the last few days, which when writing the description I thought I should expand upon.

About a 10min drive from home, this is the first place I think of when interesting weather is approaching, it looks like a good sunset, or I need along shot of the city. Parking is easy ( apart from NYE ) and I know the area so well now.

Yes there are a lot of sunset shots, but that is the time I aim to get there, with winter and the end of daylight savings though, sunsets will be alot harder to get due to work etc. But it is a great place for long exposures of the city at night, even the big fireworks shows.

I hope you enjoy this slideshow and take inspiration from the fact that one simple location can provide so much variety.

Missing from the Exif: On the Edge of Night

Sorry for the lack of updates… between a new job and a new lens… hazahh… I’ve not spent much time behind the computer…. So here is a post based around a shot I always wanted and the new lens.

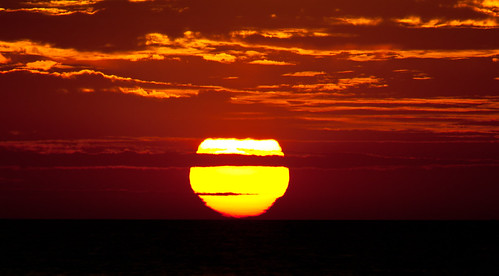
One of my favourite shots of the the setting sun, is the melting on the horizon version.   The one with the full disk of the sun visible through the long light, and just at the point it is touching the horizon, with the extra distortions that the atmosphere gives the shot.

When I first got my Nikon D90 DSLR, it came with an 18-55 and a 55-200mm lens kit.  All very nice, but 200mm still meant I had to crop a lot on the image to get the focal point out of the shots I was taking.  Next was my 70-300mm.  Much better… but still to much cropping on a 12megapixel image to pull the shot I wanted.

Finally I got my Sigma 150-500mm.  For two weeks after I got it, I was running down to the beach at sunset.  And every evening I either had something on at sunset, or as was the main case, a beautiful sunny day would turn cloudy at the last min, or the line of cloud 15degrees above the horizon would still be there.

Now I am lucky I live 10min drive from the water and that the sun sets over Port Phillip Bay in Melbourne for me.  To be honest I am not a morning person, so having to get up at 5am for the shot wasn’t going to happen.

Finally, I get the cloud cover I want, and the major bit of luck the atmosphere I wanted.  It is always hit and miss with sunsets as to what you will get, if the sun will slide cleanly into the water, or play nice optical tricks in that last few min before it sets.  Here I got that balance.

This is a hand held shot, although a tripod for the sunset does make life much easier, even though you have to tweak the position of the camera on the tripod as it will move a few degrees as it sets.

This is a touch of patience and a touch of luck, combined with a 500mm lens.  I hope you like it as much as I do.

On the Edge of Night

The EXIF Data:

Camera Nikon D90
Lens Sigma 150-500mm F5-6.3 APO DG OS
Exposure 1/3200 sec
Aperture f/9.0
Focal Length 500 mm
ISO Speed 160
Exposure Program Manual
Date and Time (Digitized) 2011:01:29 20:34:01
Digital Zoom Ratio 1
Focal Length In35mm Format 750 mm
Scene Capture Type Standard
GPS Altitude Ref Above Sea Level
GPS Altitude 5 m
GPS Date Stamp 2011:01:29
GPS Latitude 37 deg 53′ 54.11″ S
GPS Longitude 144 deg 59′ 4.98″ E

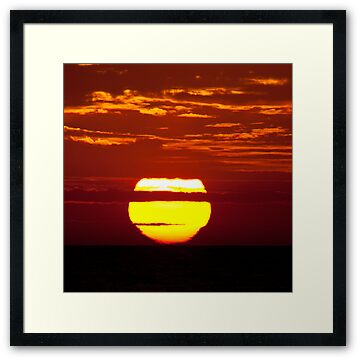
It was also featured on the RedBubble Home Page… ( Click on the link to buy the image )

On the Edge of Night

11mm to 1000mm a slideshow

Flickr Gallery showing every lens combo I have from 11mm on my Tokina 11-16mm lens to my Sigma 150-500mm. ( updated with a 1000mm shot thanks to my 2x Kenko Teleconverter

Shows you the range that you can get with just a few key lenses in your kit. – The Distance to Eureka Tower ( the tall building I zoom in on ) is approx 8.5km as the crow flies.

Best viewed full screen.

( and for those who are on non flash enabled I thingys…  go to the Flickr Set here )

All Shots were taken on Manual Settings:

Camera Nikon D90
Exposure 0.001 sec (1/800)
Aperture f/9.0
ISO Speed 200

Lens used in order were

Tokina 11-16mm, Nikon 18-55mm VR, Nikon F1.8 50mm,  Nikon 55-200mm VR, Nikon 70-300mm, Sigma 150-500mm, with each lens taking a shot at both ends of its range.

Shots are not taken for aesthetic value, and neither did I have a proper tripod set up to ensure that the shots were perfectly lined up for focus point. ( A decent tripod is next on the list of things I need to buy )

Update

the 1000mm shot is taken in Automode on a D7000 a year later than the above shots from the same location care of a 2x Teleconverter.  The haze in the shot shows the limitations of long shots as well.

Latrobe Valley Drive Video

So I didn’t get to do a big road trip this Xmas… so to get the cobwebs out the the car and my brain, I did I quick one day 500km round trip to get some photos I had always wanted.

This video is the Moe and surrounds part of the trip. The to and from Moe was just freeway driving, so here is the more interesting 220km (roughly) of the trip. Video was recorded on a Microsoft HD Lifecam at 720p at 7.5fps, then compressed down to a single 5min movie.
Enjoy.

(Choose full screen to watch in HD, or watch on youtube for lower res version )

The Approx Route of the video ( this doesn’t include a couple of dirt tracks that I drove up, like the road to Mt Erica Car Park )

View Larger Map

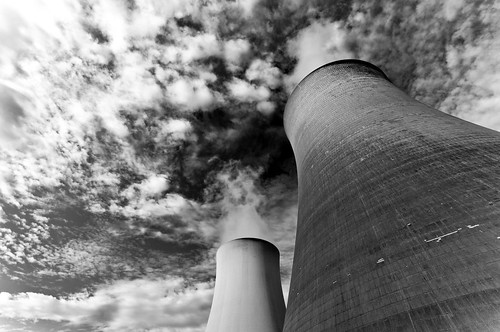
And what I was after were shots like this of the Power Stations in the Latrobe Valley.

Keep your Cool ( B&W Version )

And the trip was timed for sunset… ( which luckily for me had some nice golden colours )
Across the Ponds

( These Shots are also on Redbubble as well )

Missing from the EXIF: Lightroom Tweaks to Midnight Fireworks

This post shows how I created this image via all the processing in Adobe Lightroom 3.4 ( The previous blog entry Missing from the EXIF: Midnight Fireworks covers the details of the actual shoot itself )

Most of the processing was done when I got home from the fireworks show, with only additional cropping the next day before it became the Redbubble version of the image.

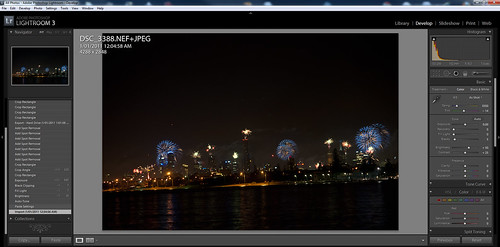
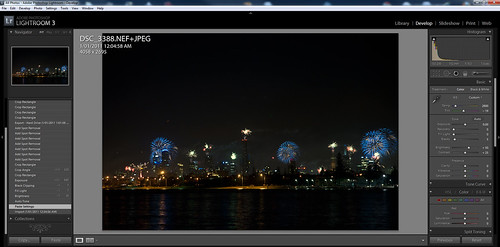
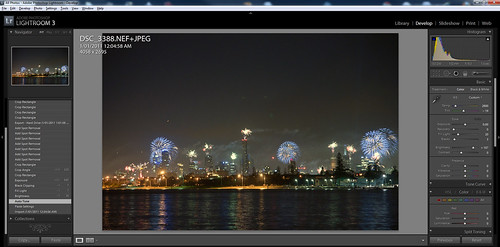
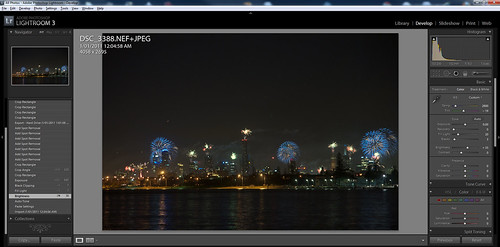
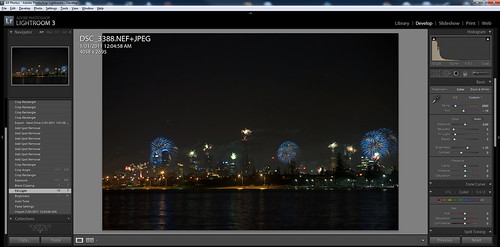
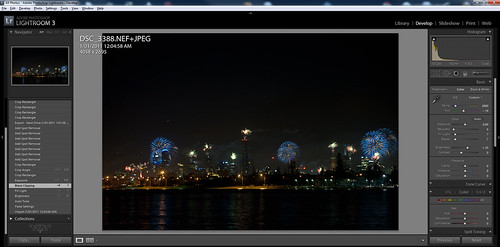
Each of these images opens into a new tab/window, in Flickr Lightroom mode so you can see all the details.  These are untouched screenshots, so that you can see the whole process I went through.

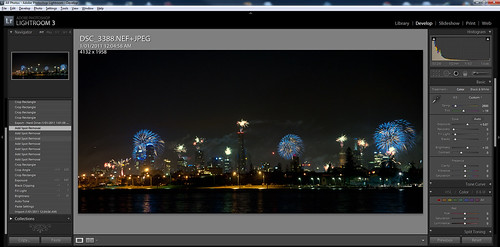
This covers from 12:54:56am when I opened imported the image to Lightroom, to 1:01:58 when I exported the image for uploading to Flickr.

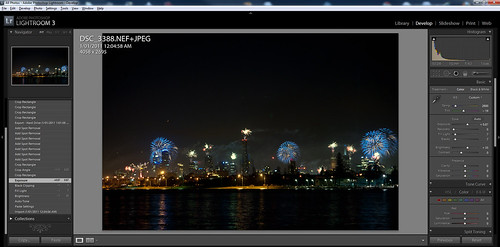
Stage 1: The Raw Image.  Shoot RAW, if you shoot JPG once you start pushing an image you will run into its limitations.  RAW as the digital negative is way more forgiving.  Further as Lightroom is non-destructive on your RAW files, you can tweak till your heart is content, and still go back to the original if ( in my case when ) you go to far.

Midnight Fireworks in Melbourne -Stage -import

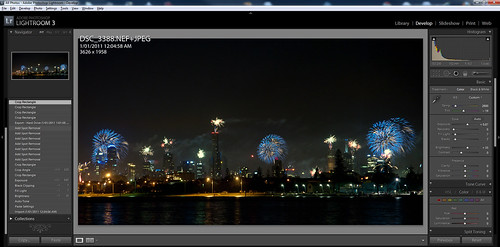
Stage 2: Rotate and White balance. – As all the images from the start of the show to the finish were in the same light, and the camera was fixed to a tripod, I tweaked one image quickly for rotation and balance.  Then in Lightroom, copied only those develop settings, then pasted them to all the images. ( Batch processing even small parts of a job like this is a great way to speed up developing. )

Midnight Fireworks in Melbourne -Stage 2-straight-wb

Stage 3: Autotone. – I never like how many tools AutoTone images.  To my eye, they always over expose the image and it always end up washed out.  But it is a great place to start.  If you treat Autotone as a starting point, then you are o.k… it never should be an end point.  Also I find, at least with my Nikon NEF (RAW), that the image always looks insipid, especially bright colours.  So expect to have more work after using this feature.

Midnight Fireworks in Melbourne -Stage 3-autotone

Stage 4: Brightness. – First thing to fix after the AutoTone, is brightness.  This was an image taken at midnight, I want the fireworks to standout, not the sky, or the water.  In this case, even a small reduction in brightness, brings the fireworks out of the sky.

Midnight Fireworks in Melbourne -Stage 4-brightness

Stage 5: Fill Light. AutoTone also introduces a fill light. Great for bringing objects out of a shadow.  But once again, that is not what I was after.  Drop the fill light right back for this style of image.

Midnight Fireworks in Melbourne -Stage 5-fill-light

Stage 6: Black Clipping. Pushing the black levels up, pulls the bright colours of the fireworks out of the background.  Also a small increase in black levels can hide a multitude of sins.  Be careful not to push it to far, as it can go from forgiving to punishing an image very quickly.

Midnight Fireworks in Melbourne -Stage 6-black-clipping

Stage 7: Exposure. Here I pushed the Exposure of the image up just a fraction.  Suddenly the colours that were a bit dulled with the Black Clipping and Fill Light, push back up, giving the image its vibrancy once more. ( Also don’t be afraid to play with the Vibrance and Saturation modes in the Presence panel, these can help lift an image. )

Midnight Fireworks in Melbourne -Stage 7-exposure

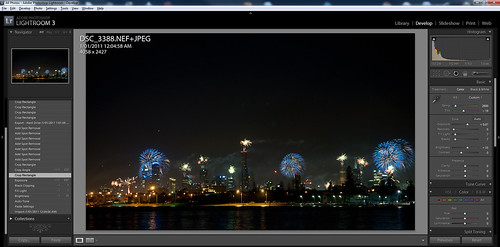
Stage 8: Crop – Possible the most important stage in this images development.  One that can take a broad image redress the balance issues and transform it to a striking image. In the first instance it was to balance the image to the rotation that had been put on the image in import. Then I major crop to pull out a lot of the empty space that was the sky.  Lightroom in crop modes gives you a nice rule of thirds crop tool.  So I balanced the image around a series of thirds for the fireworks and the sky above the skyscrapers.

Midnight Fireworks in Melbourne -Stage 8-crop

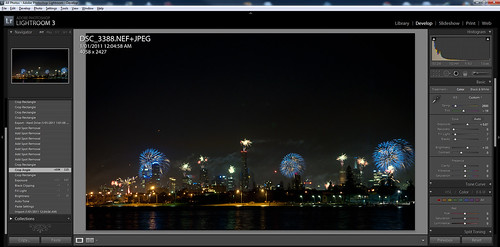
Stage 9: Angle Correction  – Don’t you hate, when you fix and angle and it still isn’t right.  Once the image was  initially cropped, I could see the leading lines clearer and the horizon looked a fraction out.

Midnight Fireworks in Melbourne -Stage 9-angle

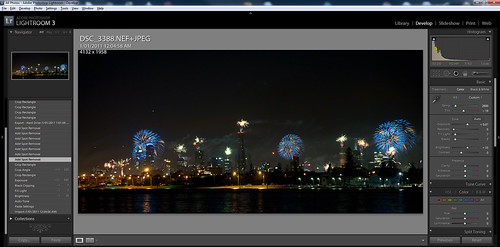
Stage 10: Lens Flare Removal – 3 annoying green dots appeared on the image.  Small lens flares from the bright light of the fireworks.  Lucky for me, these could be quickly and easily removed as they were in a black area of sky, and not hanging over an important part of the image.  If they had been, it would have been a lot of work to clean these up.  And Photoshop would have been the tool I would have had to switch to.  The Spot Removal Tool can quickly pull pixels from a reference area and this only takes a few seconds to get rid of what really are just blemishes on the image.

Midnight Fireworks in Melbourne -Stage 10-lensflare-removal

Stage 11: Aircraft Removal – Once again using the Spot Removal tool, I removed the 3 little traces of light that were in the image that were the aircraft that were filming (I presume), the show.  At such a short exposure, the lines they made only served to act as distracting elements in the final shot.

Midnight Fireworks in Melbourne -Stage 11-aircraft-removal

Stage 12: Final Crop for Redbubble – Looking at this image the next day, I really wasn’t happy with the balance of the image.  It had to much space on the left hand side, and it was still way to top heavy. Before uploading the image for sale, I tweaked the crop to balance the image better, and give it its final aspect ratio as well.

Midnight Fireworks in Melbourne -Stage 12-final-redbubblecrop

Anyway I hope you can see from above, that 5 min in Lightroom can take a good image and help to transform it up at least a few levels.  Apart from managing my complete image libary, 90% of my images never leave Lightroom, I can do all the “digital developing” I need just in the one tool.

Remember if you buy a copy of this image… the money will help me buy more camera equipment… ( Next on the list the Sigma 50-500mm OS, which would have given me even betterer shots :-))

Missing from the EXIF: Midnight Fireworks

New Years Eve… if you are lucky with the weather and the crowds can result in some great fireworks shots. This is the process I went through to ensure I got the shots I wanted.

First thing to do is plan. Where are you going to be, what shots do you want, and how much time are you willing to spend to get them. Getting in nice and close to the action is all well and good, but does require a big investment in time and patience. In Sydney, that can mean setting up at 8am for a midnight shoot, fighting the crowds all day to keep that clear line of sight. A clear line of sight, that come the 10 second count down can disappear in a flash as people stand up around you. In Melbourne, it isn’t quite that bad, but facing crowds for 6+ hours to get a shot, was not how I wanted to spend my New Years Eve.

So I took an easy way out… I went for the long shot. The whole of city across some water was what I was aiming for. Luckily for me, my fav place to shoot sunsets provided just the view I knew I wanted. So I had the shots pre-planned in my head some days before hand and didn’t have to fight crowds and traffic to get them.

Next on the list is practice. The midnight fireworks show might run for 10minutes. That is not the time to be changing your lens, testing focal settings, and different exposures and apertures. That 10min is all about getting the photos. In Australia (not sure about other places around the world), there are two shows. The family friendly version, much shorter, and just after dusk, and the main event. So I headed to the beach 1 hour before the first show to do a practice run. The one hour also meant I still could get a few shots of the sunset, and work out the best place to be before the fireworks started.

Whilst waiting, it is a good time to get some shots in as well. We had a stunning sunset on the 31 of December 2010….
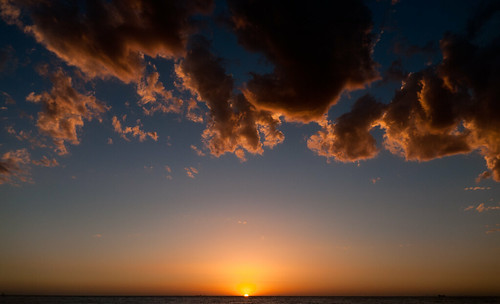
Final Sunset of 2010 #nyemelb

So a few shots of that… help to tell a story, that of the whole evening….

I originally had my self set up on the Jetty at North Road, with only a few people sitting on it, it seemed to give me the shots I wanted over the water to the city skyline.  But then as more and more people walked on the Jetty, I noticed a small problem.  Camera shake.  Every single person that walked on the metal jetty gave the camera lens a small vibration.  Now shooting at 100mm plus and aiming for 3second exposures was just not going to work.  But I still had plenty of time to move to a new location just off the Jetty itself.

This then gave me another great shot.. The crowd on the Jetty, on dusk waiting for the show to being.
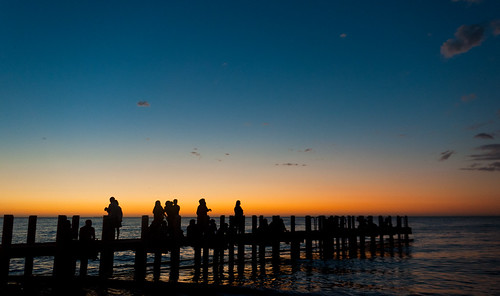
Waiting for the show #nyemelb

I had a rough idea of the camera settings I was going to be using… but as always the actual light at the time always change things.  The other big factor is wind.  A small breeze on the camera unless you have a very heavy tripod and a sandbag will give you camera shake.  Camera shake = ruined photo.  And this was a problem for me coupled with the choice of lens I made for the first of the evenings displays.  I only managed a few good shots.  Shots that were in focus, had a nice display of fireworks and didn’t have camera shake.
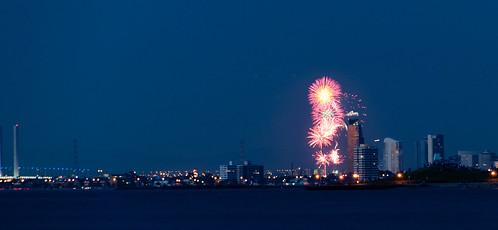
Let the Show Begin #nyemelb

EXIF on this shot…

Camera Nikon D90
Exposure 1.6seconds
Aperture f/8.0
Focal Length 200 mm
ISO Speed 200
Lens: Sigma 18-200mm f/3.5-6.3
Exposure Program Manual

I did attempt a few shots with my longer 70-300mm lens, but this lens (like the Sigma) doesn’t have Vibration Reduction (also known as IS or OS or VR ). With the slight breeze and the longer focal range, all of these shots bar a couple just didn’t work out.  So I knew that when I went back for the main event, I would take my trusty 55-200mm Nikkor VR kit lens.  Under 200mm was still going to give me the shot I wanted anyway. And every little bit helps as they say.

So after getting these shots it was a quick 10min drive home to download the shots onto the computer and see what I had via lightroom.  As much as I love the big screen on the Nikon D90, nothing beats looking at the shots on a 24″ 1920×1080 monitor to check for focus and clarity.  This one of the big advantages of going for the long shot, over the close up shot.

Now, I was ready, I could empty the card for the evening, make sure my battery was fully charged, that the remote was working correctly and the most important thing, that I was sober.  Taking good photos on New Years Eve does mean you will miss out on a few drinks.  A clear head is certainly required.

Back to the beach I went, 3/4 of an hour before the main event.  But unlike last time, there was no stuffing around trying to work out where to stand and what the shots would or would not look like.  Tripod was set up front row on the breakwater, so no one could stand in front of me, and I was ready for the main event.

And away I went.  I did some test shots over the city just before midnight, to make sure that the Exposure and Aperture were correct.  10 second count down…  and the show is on.

It is a great thing to watch, and that is what I did.  Using the wireless remote I didn’t have to touch the camera, just change focal lens a few times to get some different shots. Fire off some shots, quick look at the viewfinder, whilst still watching the show, fire off some more.. repeat.  10minutes is not long….

Get home, quick process to put up a shot just showing the event, then leave it for the evening…

Next day, spend some time in lightroom, delete the junk shots no point in keeping them… Then check all your keepers for white balance, crop, angle, sharpness, colour, e.t.c.  I ended up with 4 keepers that I have put up on Redbubble from that evening.

But this is the shot that most people seemed to love.

Midnight Fireworks in Melbourne #nyemelb

The EXIF Info:

Camera Nikon D90
Exposure 1.6seconds
Aperture f/4.5
Focal Length 102 mm
ISO Speed 200
Exposure Bias 0 EV
Flash No Flash
Date and Time (Modified) 2011:01:01 01:02:01
Exposure Program Manual
Date and Time (Digitized) 2011:01:01 00:04:58
Exposure Mode Manual
White Balance Auto
Focal Length In35mm Format 153 mm
Creator Tool Adobe Photoshop Lightroom 3.3
Lens Nikkor 55.0-200.0 mm f/4.0-5.6 VR

So as you can see from this overly long blog post…. a bit of thought and effort does go into these shots.

I hope you enjoy them as much as I did in taking them.
The versions on Redbubble, are all with different coloured fireworks and a different colour dominating the shot.  This is so that you can choose a framed print that has a colour that suits the space you are putting it in. ( and please do buy them 🙂 from  Redbubble ( it does help me buy more camera equipment ) )

( And the complete Flickr Set is here of all the fireworks shots plus the ones above. )

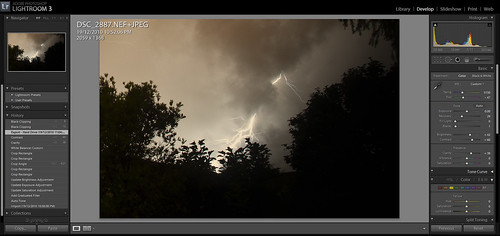
Behind the Exif: Bolt ( Lightroom Tutorial – Why I shoot Raw!)

Remember my photo of the bolt of lightning from the other day, I thought I would show you how I went from the photo to the final image via Lightroom 3.3.

This also may help to show why I use Lightroom all the time for my post processing, and why I shoot RAW.

(All the images open in a new window, in lightbox mode )

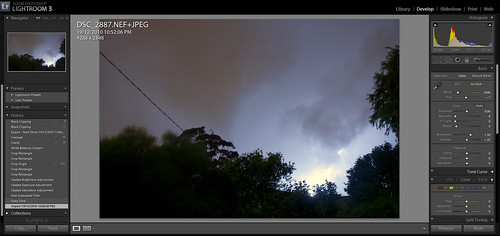
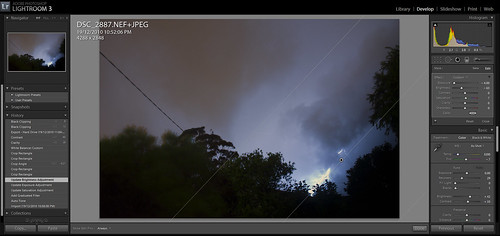
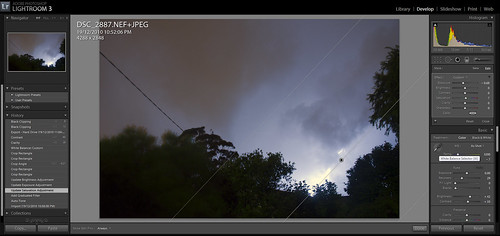
Stage 1: Opening the Raw file in Lightroom, which shows you the shot as taken.  On the large version of the image you can see all the details about the image.

1/8 - lighting-import-raw

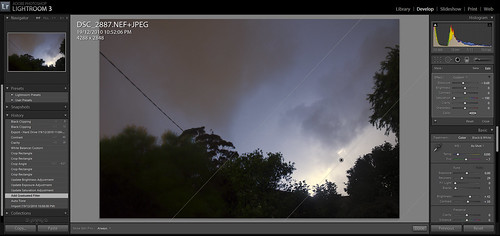
Stage 2: A gradient filter is placed on the bottom right hand corner, where the image is obviously over blown from the lightning bolt. ( You will notice a new box of controls has opened underneath the Histogram, which are the Exposure, Brightness, Clarity, Contrast etc controls just for the gradient ) I drew a gradient in the bottom right hand corner to deal with the lightning bolt only.

2/8 - lighting-add-grad-filter

Stage 3: This was a fix to the Saturation. The Graduated Filter always remembers the last settings it was on. So I needed to reset the values back to default settings, so then I could establish the baseline values I was after.

3/8 - lighting-filter-exposure

Stage 4: Dramatically under exposing this part of the shot, whilst on the gradient brought the bolt out of the background.

4/8 - lighting-final-filter-brightness

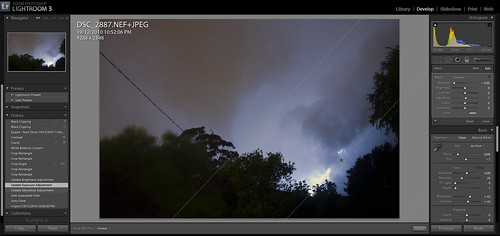
Stage 5: This was a change to the Brightness only on the gradient. This meant I could pull the corner of the image down from its over exposed values.

5/8 -lighting-finish-filter

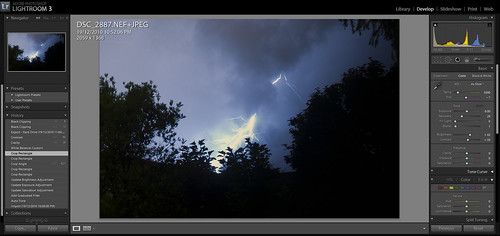
Stage 6: Cropping took the longest to get right. I wanted to pull the shot in for the most dramatic effect, whilst still having a large enough image.  Also I wanted to keep some of the foreground elements in place to frame the image. You may also notice the Histogram for the image is now a lot more balanced as well, post crop.

6/8 - lighting-crop

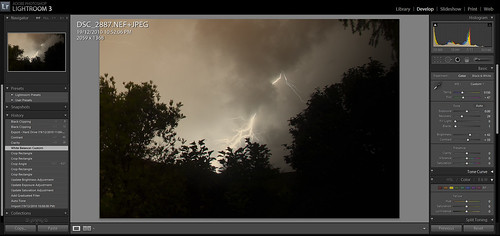
Stage 7: White balance is very easy to configure in Lightroom, via the eyedropper.  Moving the eyedropper around the image, you can see the change in real-time in the small preview window.  I went for a colour that was closer to reality from the clouds, than the lightning.

7/8 - lighting-whitebalance

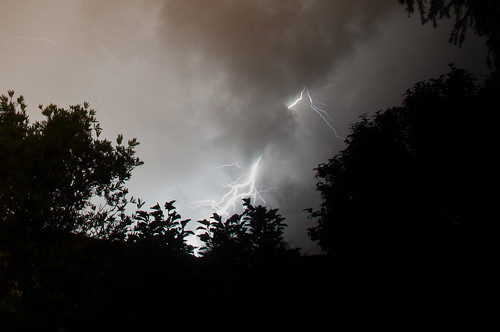
Stage 8: A small tweak to the Contrast and Clarity of the image, just to bring the lightning bolt out and sharpen the image a bit. Then Export. ( I have a Flickr template set up, which is 1920px along the long edge and 72dpi )

8/8 - lighting-final

This took about 5 min to get right, most of which was playing with the crop. ( The shot was taken outside my house at 10:52,  then the time codes were 10:58 import, 11:04 export )

As you can see, shooting with RAW, meant that I got a good photo out of what would have been a bad JPG. My only regret is that I had to crop to much, but that was the weathers fault, not mine ( well I am blaming the weather ).

The EXIF info:

Camera Nikon D90
Exposure 30
Aperture f/11.0
Focal Length 18 mm
ISO Speed 400
Exposure Bias 0 EV
Date and Time (Original) 2010:12:19 22:52:06
Date and Time (Modified) 2010:12:19 23:04:58
Exposure Program Manual

And the final Shot…..

Bolt

Ten of my fav shots of 2010

In no particular order….. with a few details on why I choose each of them.
Of course, I will walk away from this blog post, and go… oh shit, what about x or y…  but these are the stand outs for differing reasons.
But one thing these shots have in common is getting out there.  Sitting behind the computer may get you a few shots, but going out in the rain, the heat, the crowds, the isolation will get you the good photos.

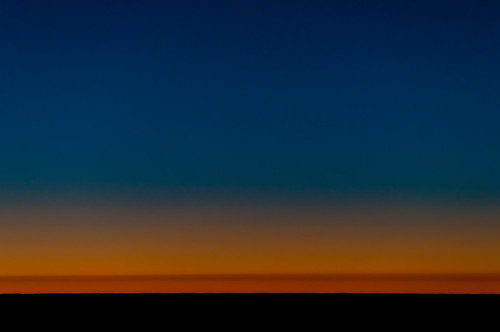
10,000 Meters

10,000 Meters

Taken from an aircraft window, the colour for me tells the story.  This is one of my no subject matter shots, that says photography is still art.
Buy this at Redbubble

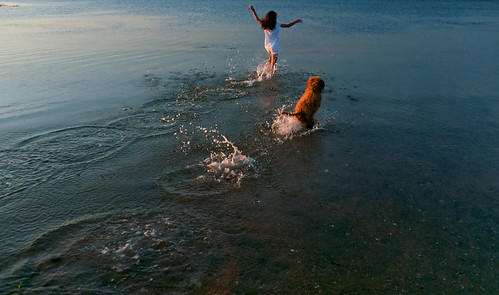
Freeeeedom

Freeeeedom

Taken at Brighton Beach, this shot for me is about fun, summer and expression. And a lot of luck to get all the elements and the camera in play at the same time.
Buy this at Redbubble

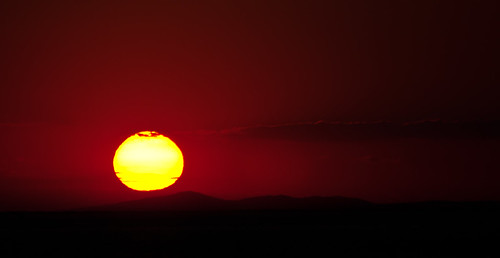
The end of 10

The end of 10

Oh so many sunsets to choose from….  This one has it all, the light, the colour, shapes and silhouettes.
Buy this at Redbubble

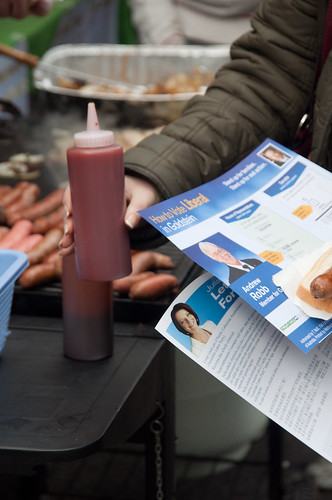
Voting in Australia

Voting in Australia #snagvotes

I was really pleased with this shot, one a quite a few, trying to capture what Voting in Australia really means.

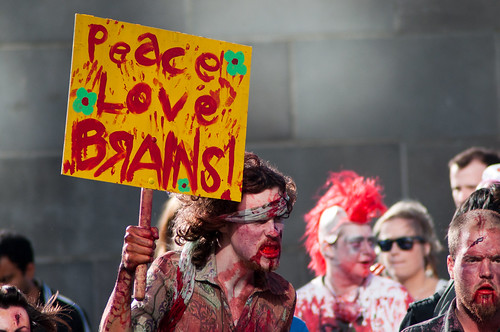
Peace Love Brains

Peace Love Brains

For the life of me, I have no idea how I got the lighting on this shot so right. Taken at the Melbourne Zombie shuffle.

We Shall Remember them

We Shall Remember them

This is the first dawn service I have got up for in quite sometime.  One of the hard things, was trying to find a place to get a photo from, due to the crowds.
Buy this at Redbubble

Some people are just born Republicans

Some people are just born Republicans

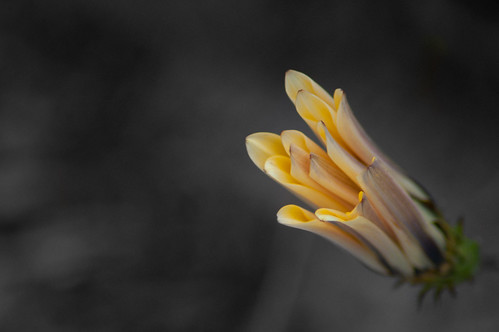
Taken the day after I got my new 300mm lens, this is a still photo as a story.

The Way Home

The Way Home

Still one of my all time fav shots. This shot is a what the camera see’s, not what I saw.  And is the shot I was aiming for. I could see all the details in the dim light, I set the shot up to remove them and it worked.
Buy this at Redbubble

Closing up for the Day

Closing up for the Day

The depth of field and colouring in this shot all just sat together perfectly for me.
Buy this at Redbubble

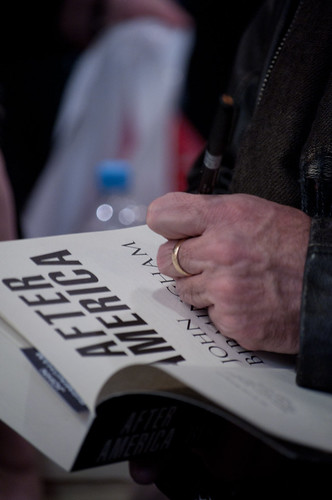
@JohnBirmingham signing his new book After America

@JohnBirmingham signing his new book After America (Close up)

I was trying to get a photo of John, but one that told a story, not just a “fan” photo. This I felt was the essence of why he was where he was at the time.