Behind the Exif: Bolt ( Lightroom Tutorial – Why I shoot Raw!)
Remember my photo of the bolt of lightning from the other day, I thought I would show you how I went from the photo to the final image via Lightroom 3.3.
This also may help to show why I use Lightroom all the time for my post processing, and why I shoot RAW.
(All the images open in a new window, in lightbox mode )
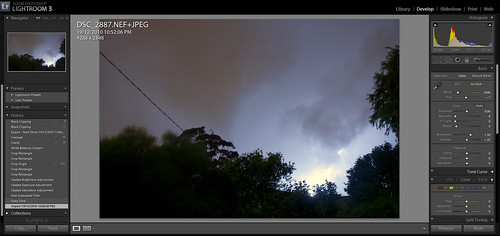
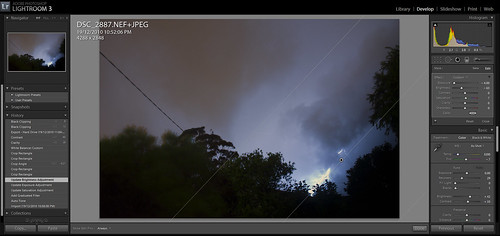
Stage 1: Opening the Raw file in Lightroom, which shows you the shot as taken. On the large version of the image you can see all the details about the image.
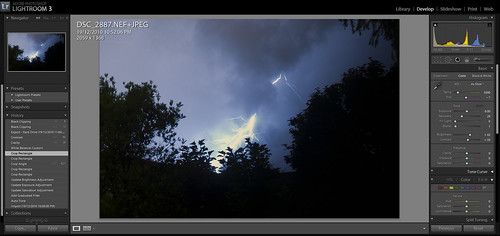
Stage 2: A gradient filter is placed on the bottom right hand corner, where the image is obviously over blown from the lightning bolt. ( You will notice a new box of controls has opened underneath the Histogram, which are the Exposure, Brightness, Clarity, Contrast etc controls just for the gradient ) I drew a gradient in the bottom right hand corner to deal with the lightning bolt only.
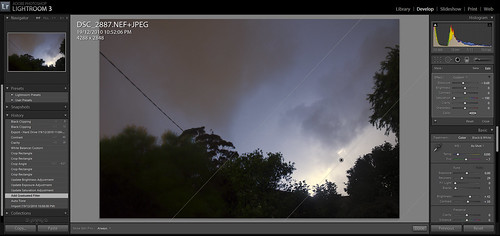
Stage 3: This was a fix to the Saturation. The Graduated Filter always remembers the last settings it was on. So I needed to reset the values back to default settings, so then I could establish the baseline values I was after.
Stage 4: Dramatically under exposing this part of the shot, whilst on the gradient brought the bolt out of the background.
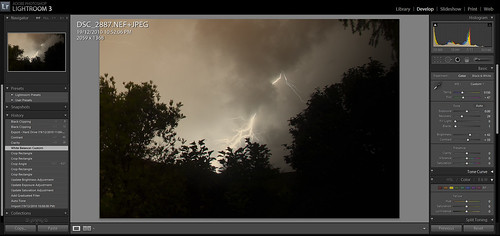
Stage 5: This was a change to the Brightness only on the gradient. This meant I could pull the corner of the image down from its over exposed values.
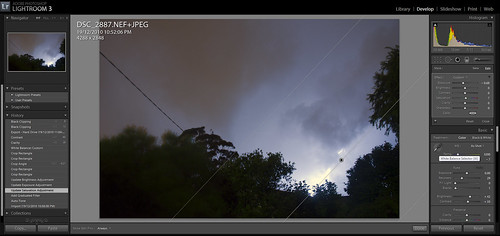
Stage 6: Cropping took the longest to get right. I wanted to pull the shot in for the most dramatic effect, whilst still having a large enough image. Also I wanted to keep some of the foreground elements in place to frame the image. You may also notice the Histogram for the image is now a lot more balanced as well, post crop.
Stage 7: White balance is very easy to configure in Lightroom, via the eyedropper. Moving the eyedropper around the image, you can see the change in real-time in the small preview window. I went for a colour that was closer to reality from the clouds, than the lightning.
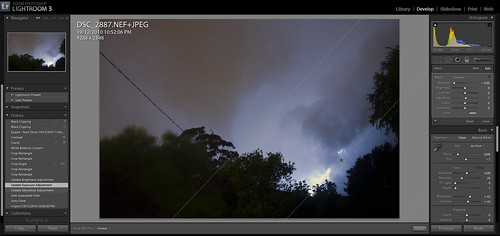
Stage 8: A small tweak to the Contrast and Clarity of the image, just to bring the lightning bolt out and sharpen the image a bit. Then Export. ( I have a Flickr template set up, which is 1920px along the long edge and 72dpi )
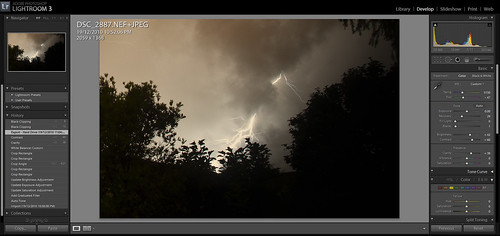
This took about 5 min to get right, most of which was playing with the crop. ( The shot was taken outside my house at 10:52, then the time codes were 10:58 import, 11:04 export )
As you can see, shooting with RAW, meant that I got a good photo out of what would have been a bad JPG. My only regret is that I had to crop to much, but that was the weathers fault, not mine ( well I am blaming the weather ).
The EXIF info:
| Camera | Nikon D90 |
|---|---|
| Exposure | 30 |
| Aperture | f/11.0 |
| Focal Length | 18 mm |
| ISO Speed | 400 |
| Exposure Bias | 0 EV |
| Date and Time (Original) | 2010:12:19 22:52:06 |
| Date and Time (Modified) | 2010:12:19 23:04:58 |
| Exposure Program | Manual |
And the final Shot…..
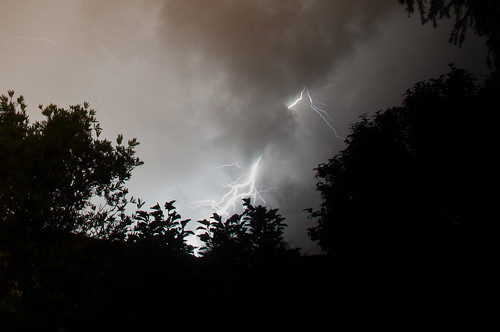


Discussion Area - Leave a Comment