Tokina AT-X 116 PRO DX : Review "ish"
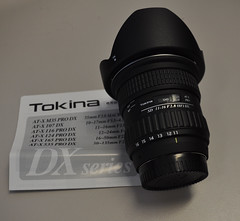 The very long overdue post about my birthday present lens…. (and by birthday present I mean not only Mrs Wolfcat but the rest of the family all chipped in for this…)
I had been looking for a wide lens for quite some time… esp since my road trip last Xmas where I spent a week in outback NSW. A place where I shot so much at 18mm (the widest I could go with my kit lenses) I knew that a wide angle would be one lens that would get a lot of use on the camera.
 So why the Tokina and not say the new Nikon 10-24mm which has an even bigger range. Two things… firstly range isn’t that important with a wide angle lens. Most of the shots I take with this lens are done purely at the 11mm mark. Occasionally at the some where in-between… but rarely so. I often try and use foot zoom. (the old step back or forward). Secondly the speed of the lens. The Tokina is a constant F2.8 lens… which means it sucks in light. The Nikon wides are F3.5 to 4.5 and still don’t have optical stabilisation. So the Tokina has most of the wide part of the range I wanted and works much better in low light. (Also there is the small issue of cost… the Tokina is a LOT cheaper, and IMO a much better lens)
 Now owning the Nikon D90 also meant that I can autofocus with this lens. A point to remember about cheaper Nikon DSLR’s is that they drop the autofocus motor on models such as the D40, D60 and D5000. So whilst you could use this lens you will need to manually focus. Manual focus on this lens though is a thing of pure beauty. It has the nicest autofocus/manual focus mechanism that you can play with. Your hand is usually already on the barrel of the lens, just pull the focus ring forward and you are in manual focus. No fiddly switches on the camera body or on the lens.
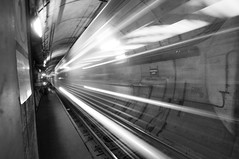
One thing to realise about this lens is that it is really WIDE. And because of this… that nice little inbuilt flash on your camera is a big fat no go. The lens casts such a shadow that it shows up in any photo with the inbuilt flash. You might be lucky and crop it out of a shot… but don’t bother… just get a real flash (PS can someone please buy me a real flash 🙂 as I don’t have one yet). The other thing to watch with the wideness of the lens is when doing macro work is the same shadowing comes into play.
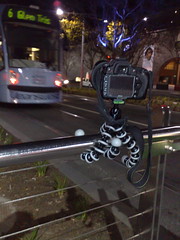
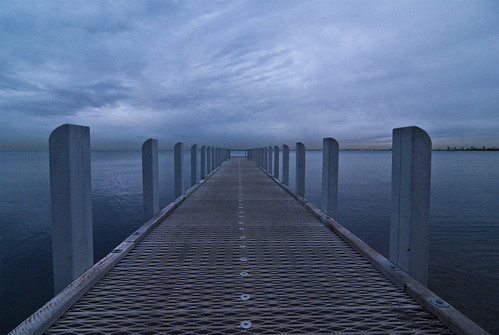
 There are going to be some people that think… what macro work, wide angle lens… but then the are missing the point. A wide lens is not just for getting it all in, but is great for throwing out perspectives and getting nice and close as well. Being a very fast F2.8 lens it works very well indoors with soft ambient lighting. This means you can get some great naturally lit hand held shots with no distracting flash calling peoples attention to your photography.
 One thing you will notice straight away over a kit lens is that it’s a very heavy lens at just over 1/2kg you will notice the weight when carrying it around all day. But I prefer to measure by the on camera weight. With my Sigma 18-200 F3.5-6.5 lens I am holding 1.2kg in my hand, with the Tokina it is 1.35kg. Those extra grams all start to add up especially after shooting for a couple of hours. (Note I don’t have a battery grip either so this weight is the D90 + internal battery only).
So here is the technical info for those that just care about the numbers….
| Mount availability: | Canon and Nikon APS-C |
| Focal length: | 11 – 16mm |
| Maximum aperture: | f/2.8 |
| Minimum aperture: | f/22 |
| Optical construction: | 13 elements in 11 groups. |
| Coatings: | Multi-layer |
| Angle of view: | 104°~82° |
| Minimum focus distance: | 0.3m |
| Reproduction Ratio: | 1:11.6 |
| Focusing Mode: | Internal Focusing |
| Zoom Mode: | Rotary Zoom |
| No. Aperture blades: | 9 |
| Filter Size: | 77mm |
| Lens length : | 89.2mm |
| Lens Hood: | BH-777 |
| Weight: | 560g |
| Accessories: | Flower design Bayonet lens hood (BH77A) |
I purchased this lens from D-D Photographics by phoning them at 1:30 on a Thursday to check that they had it in stock and it was sitting on my desk in Melbourne less that 24 hours later. The other great advantage was that they had just dropped the price a few days before so I also managed to buy a Hoya Super Pro Filter (Super MHC Pro1 UV) for the lens and with shipping it still came in under 1k.
I’ve had this lens for over a month now and it easily spends 60% of its time sitting on my camera. If you are thinking about a wide lens… do try and track one of these down just to have a play, you might, like I did come away having brought one.
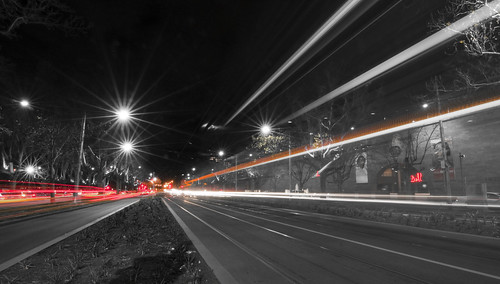
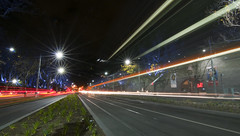
 Last weekend I finally got one of the great weather shots that I had always wanted to get…

 Now in the layers palette make a duplicate of the background (drag the background onto the new layer icon, next to the trash). This way you have a nice original layer to return to if you make a mistake and don’t want to reimport everything.

 Once the layer is created, simple Paste (CTRL+V) the colour layer into the new Layer 1. Now you have a in this case Red only channel to play with.
 Perhaps at this point you are thinking that really it is all wishy washy and not worth the effort so far. Yes you are right. Often at this point the colour is not that intense. The easy fix at this point is to duplicate the colour layer one or two times (sometimes more) until you get the desired strength of the output you are after. In this case it was only two layers.
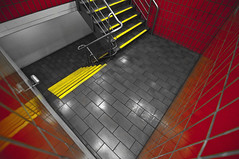
 Now this image was easy. Here you can see the isolated red layer and the placement of colour across the image. But say there was a red light at the top of the image, that you really didn’t need. On this layer (making sure you merge down all your duplicates if you have created them) you get the eraser tool and delete the areas of colour you don’t want. If I was being really fussy I could have deleted a few spots of red around the place just to clean the image up. (another tip… before you start erasing stuff, duplicate this final colour layer, turn it off… that way you don’t have to worry about the history buffer going to far when doing fine erasing)