Entries Tagged as 'Nikon D90'

Missing from the Exif – First post

Thought I would add the some of the stuff from photos to my blog, the sort of stuff that you do not find in EXIF data… the stuff that really makes a photo.

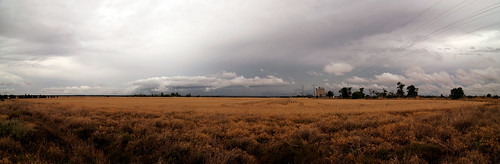
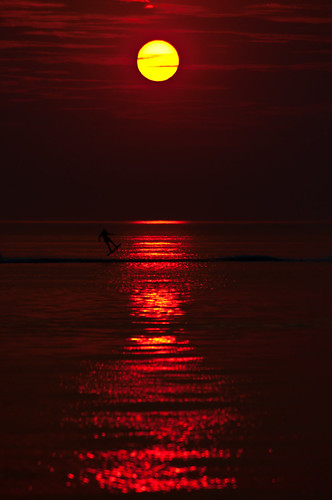
First cab of the rank so to speak will be my sunset photo from the other day…. of course if there are flickr photos you want the story behind, just drop me a line.

The basic shot was planned 3 hours before hand, when I noticed the smoke around the city from the series of burn off’s that the DSE was conducting that day.

Now smoke in the atmosphere will ALWAYS give you a red sunset. And if the smoke is thick enough, you will be able to see the whole disk of the sun with the naked eye, let alone needing ND Filters.

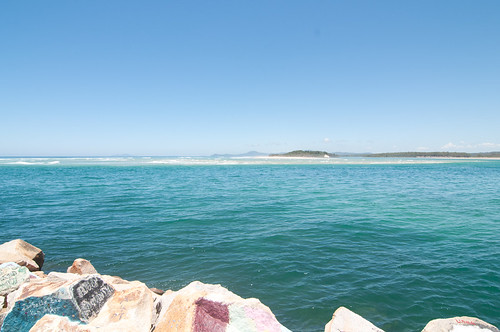
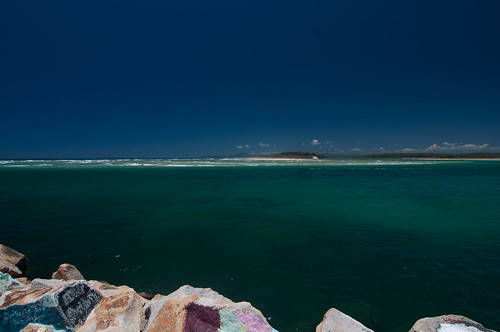
So I know it is going to be a great sunset, so I get home from work grab all my gear and head to my favourite place where I know that I can get the sun setting over water every time. Before I go however I have I quick scan over my flickr sunset set just to make sure I have the approx F Stops and Shutter speeds for similar photos in my head.

When I got to my location, I like always fired up the GPS on my phone to create a log file so that I can tag the photos… and because I am shooting the sunset swap to my 70-300mm lens. I’m after the sun as big as I can get in the shot (well at least very large, so am looking at the 200mm+ range)

Also I have my Hoya 62mm Circular Polariser on my lens. Now I have the cheap 70-300mm which has the problem that the front element rotates on focusing, meaning that you have to tweak the Polariser every time focus changes.

So that kind of covers the technical side of things… then that bit of luck comes into play. There was a boat with a wake boarding moving up and down the bay right opposite the outcrop I was standing on. This shot was the 4th shot I took of them.

As this shot is all manual, this is what I did. I took a practice shot of the sunset to make sure that the colour and lighting were correct. Then as the boat passed left to right I got a focus lock (single point – centre left) on the wake board rider. This gave me the opportunity to check that the first time they went passed that I could get the shot I was after. By now I already knew how far they would travel and when the return trip would be.

Next is that moment of fear… will they pass through my shot again… will they fall off, will they do something unexpected.

Lucky for me…. They didn’t… it all went to plan. I’d also put the camera into highspeed burst mode so that I could shoot more frames that I needed to capture the action. Given that it took the rider less than a second to pass through the sweet spot of the image I wanted to give myself every chance. As the rider got close to the the sun I made sure that I had focus lock on him and just panned the camera as he moved from right to left.

The biggest piece of luck however was when the rider decided to jump. Just before the reflection of the sun from my point of view.

So that is how I fill a blog post writing about a lucky image that took a lot of understanding to get.

So look at the EXIF data of peoples shots to see how the shot was done.. but really… look at the photo and that will tell you how it is really done.

(also you will find this image on Redbubble, with the Lat Long on the final image, where you can buy it from a post card to a framed print)

(oh nearly forgot)

Here is the EXIF Data:

Camera: Nikon D90
Exposure: 0.002 sec (1/640)
Aperture: f/5.6
Focal Length: 200 mm
ISO Speed: 250
Exposure Bias: 0 EV
Exposure Program: Manual
Date and Time (Original): 2010:03:25 19:12:24.00+11:00
Metering Mode: Multi-segment
Exposure Mode: Manual
White Balance: Auto
Digital Zoom Ratio: 1
Focal Length In35mm Format: 300 mm
Scene Capture Type: Standard
GPSVersion ID: 2.2.0.0
GPS Latitude: 37 deg 53′ 57.12″ S
GPS Longitude: 144 deg 59′ 2.35″ E
GPSAltitude: 9.5 m
Creator Tool: Adobe Photoshop Lightroom
Lens: 70.0-300.0 mm f/4.0-5.6

Geotagging without a dedicated GPS on your DSLR

Now of course this works for any camera digital camera not just high end DSLR’s.

I guess people are going to say but who cares about Geotagging photos.  That is easy… say you are on a once in a lifetime trip heading to some out of the way places or even just around town.  You take that great photo of a beach, a wall or even a person… now in 6 months time are you going to be able to find that location again are you even going to remember where it was roughly…    This is why I geotag my photos.  I can now find any location for my photos from the last 3 years, because all the photos have it stored in the Exif data.

I am going to show how using the GPS built into my phone running in the background I can do this.  So you people with phones that have a GPS that can not multi-task will have to spend some money and get a logger to be very accurate. My Nokia N95-8gb runs Sports Tracker in the background just fine so this is what I am going to use as my example. Then by using software called Geotag will add lat long and altitude to all the images, before they are uploaded to flickr.

The biggest advantage of Geotag however is that it will add the data to the RAW files as well as the JPEG/JPG files.  Formats include ARW (Sony), CR2 (Canon), DCR (Kodak), DNG (Adobe), ERF (Epson), MEF (Mamiya), MRW (Minolata), NEF (Nikon), ORF (Olympus), PEF (Pentax), RAF (Fuji), RAW (Panasonic), SR2 (Sony) and SRF (Sony).

Geotag should run on any operating system for which a Java SE 6 runtime is available.

Of course you can just manually add lat and long to say Flickr or Picasa but if you have a big set of photos or have travelled a long distance in a few days it is always easier to get software to do it all for you without having to guess locations.

First Step.. and most important... Make sure that the time on your Phone and on your camera are as close as possible. The software works by comparing the time stamp of the photo to the time on the track file.  You can set offsets for it.. but it is just easier to get it right in the first place.

Always switch on the logging software on your phone and wait for it to get a fix.  If you just fire up the software and hit the road and start driving it can take a much longer time for the GPS to get a fix than if you are stationary. Once you are happy that the software is working you are good to go.  Another tip is to break up a journey into a series of smaller track files, that way if the software crashes you still have a large part of the trip as a log file.  For example when I have been on my road trips I’ll often stop the GPS and start a new track when ever I got out of the car to take photos.

So lets dive in…

Getting the Log File to Geotag.

Open Sports Tracker, go to Training workouts…

Select the date you are after.

Now find the first track file you want.


Then Choose, Export, then Export as GPX. Most GPS Log file software programs handle GPX and this format contains all the info you are after.
Then Choose create file only.
It doesn’t matter what drive you put this on.. so often Root Drive is just faster especially if you have a few track files to create.

.. Repeat as needed :-) …..

Then once you have all these files simply drag and drop from your phone on to your computer so then we can move to the next part of the process.

Once you have opened Geotag choose File > Load Tracks From File.

This will let you select all the small tracks files that you have created in one group so you don’t have to open each track file on its own.

Then you can either open up just the image files or a whole directory.  I tend to just import into Lightroom, do a quick pass to delete the dud shots, then tell GeoTag to look in the directory from the last import and work from that.

Now with the Track Files and the Directory Open, you right click, choose Find Locations > For All Images.

At this point a cup of coffee may be required if you have a few thousand images…

Once it has finished processing you will have all your images that the gps was working for tagged…

Then just choose Save All and you are done.  Now your RAW files and your Jpegs have the correct geodata embedded into them, so any time you upload to a service that supports Geocodes your photo will be mapped automatically.

You can of course get GeoTag to look up information such as lat, long, altitude, place names or get it to guess locations based on missing parts of the track file.

Another trick is to take one photo with your phone that is geotagged and then copy that information to the rest of the photos.  This is great trick if you are in just one place.  As another trick before going indoors take a photo of the front of the building, then use that as your tag if you cant get a GPS signal indoors.

Of course the easiest thing to do is to buy a GPS for your Camera, but if you don’t mind spending a bit of time the above steps should save you a bit of time money and still give you what you need.

(PS, I still have  dedicated GPS for the camera on my to buy list.. but I am a bit fussy like that :-))

Storm Over the Field

Taken at: 26°38’11″S, 149°54’29″E

Auto Mode is not always your friend….

Here are a two shots of the moon.

The first shot is taken with the Nikon D90 in Auto No Flash mode.

Half Moon Auto
Camera:      Nikon D90
Exposure:     0.167 sec (1/6)
Aperture:     f/5.6
Focal Length:     300 mm
ISO Speed:     800
Exposure Bias:     0 EV
Exposure Program:     Auto:No Flash

As you can see this shot is to put it blunty crap.  Crap for a few reasons… firstly it is over blown and secondly it is blury as the shot is hand held on a non VR lens.  But this is what Automode does….

This shot however is not so crap 🙂  It is still a hand held shot on the Nikkor 70-300mm F4.0-5.6G lens… which the first shot was taken with, taken only a a few seconds beforehand.

Half Moon
Camera:      Nikon D90
Exposure:     0.004 sec (1/250)
Aperture:     f/10.0
Focal Length:     300 mm
ISO Speed:     500
Exposure Program:     Manual

Here you can see the moon is nice and crisp, the craters are visible and even at 11pm I can hand hold the shot, because the object I was photographing was bright enough.

So remember get your camera off Automode every now and then and you might just get the shot you are looking for, not the one the camera thinks you are after.

Now of course the master shot to get the moon this big is still a massive crop… from 4288x2848px to 1576x1278px but still the lens has a decent reach 🙂

Now to get my hands on 500mm lens with a teleconverter 🙂

Comparing Zoom Range FX/DX Lenses for a Nikon D90 11-300mm

My new 70-300mm F4-5.6G arrived today (review to come) which finally gave me the encouragement to do this series of shots.  These  shots cover the whole range that my lens collection has from 11mm at it widest to 300mm(FX) at its longest.   This 300mm does an interesting thing due to the smaller size of the sensor on the D90 and has 1.5x multiplier effect, giving me an effective 450mm range on the 300mm lens.

You will see this effect most clearly in shots 2 and 3 which are both at 200mm. Shot 2 is the FX lens, and Shot 3 is the DX lens.   (All the EXIF data is on the shots if you click through to them)

All shots hand held on auto no-flash mode.

1) Zoom Levels – 300mm FX Lens – DX D90 Body – Nikon 70-300mm F4-5.6G
Zoom Levels - 300mm FX Lens - DX D90 Body

2) Zoom Levels – 200mm FX Lens – DX D90 Body- Nikon 70-300mm F4-5.6G
Zoom Levels - 200mm FX Lens - DX D90 Body

3) Zoom Levels – 200mm DX Lens – DX D90 Body – Sigma 18-200mm F3.5-6.6
Zoom Levels - 200mm DX Lens - DX D90 Body

4) Zoom Levels – 18mm DX Lens – DX D90 Body- Sigma 18-200mm F3.5-6.6
Zoom Levels - 18mm DX Lens - DX D90 Body

5) Zoom Levels – 11mm DX Lens – DX D90 Body – Tokina 11-16 F2.8mm
Zoom Levels - 11mm DX Lens - DX D90 Body

I will do another version of this later showing all my lenses at work as well, as I didn’t use my Nikkor 18-55mm or my Nikkor 55-200mm Kit lenses as I don’t carry them with me every day anymore.  I still use them for planned shoots esp shooting in doors, but have an 18-200mm on the camera at all times is just a lot easier and a lot less weight to carry around all the time.

Circular Polarisers the 2nd filter to buy for your camera.

The first filter to buy is obviously a UV Filter…. for two main reasons. Firstly they block UV … and secondly they are a great sacrificial part of the lens. Scratch the filter and you’re up for $50-100. Scratch the lens on the other hand… Also the filter will break first if you drop your camera, the lens tends to hit the ground first and the filter takes the shock and breaks.

But back to Polarisers…. Ever wondered how people get those amazing travel shots where the sky is a deep blue and the water a stunning green? And yet every photo you take is all washed out and even overblown?

Like this shot perhaps…

Without a Circular Polariser

The only difference between the above shot and this one is the Circular Polariser that was on the camera.

With a Circular Polariser

Now as you can see, this shot is a lot richer in its tones and colour. I should have shot the second shot a bit slower (to pull in a bit more light to compensate for the filter) but I took these shots to show the difference between with and without the filter. You will also notice that the filter has cut down dramatically on the reflection in the water showing the rocks just below the surface.

Settings for both shots were:
Camera:      Nikon D90
Lens: Tokina 11-16mm F2.8
Exposure:     0.003 sec (1/320)
Aperture:     f/8.0
Focal Length:     13 mm
ISO Speed:     200
Exposure Program:     Manual

Some people say don’t use Polarisers on really wide angle lenses like my Tokina 11-16mm. Or you get an effect like below. Now see, I liked the effect in this image… the dark banding across the sky helps weight the image to the side of the tower and results in a more dramatic effect. But one thing it does mean is that stitching a panorama can be nigh impossible (due to the colour banding across each shot). You could tweak the filter for each frame comparing it to the last (using a tripod to keep the camera steady).

Black Mountain Perspective

One thing to watch for in really wide lenses however is Vignetting (darkening in the corners of your shot, which is almost black). The Tokina 11-16mm at 11mm with a Polariser on is so wide and the filter so thick, that vignetting does show up in the corners of the shot. In most cases here I ended up shooting at 12mm or higher – just to keep the filter out of the shot. Sure I could crop out the vignetting later but pushing the lens that little bit saved me a lot of work in Lightroom later. (Best clicked through to see the large versions on Flickr)

With Vignetting

Vignetting Removed

The other issue is not touching the damned filter. It has taken me a while to get used to spinning the filter to the correct level or polarisation without touching the filter itself. Also watch for lens hoods… most of them even petal shaped hoods make it very tricking to reach the filter to move it. Now my fingers are not big mens hands either, so you may need to work out which works best for your lens and hood combination. The Tokina for example I just don’t bother with the hood when I have the filter on, the Sigma 18-200mm that I have is o.k – now that I have got used to it.

So if you are thinking about ever shooting water, sky, or the big landscape that is Australia go out and get yourself one of these filters now, in fact get more than one if you have more than one lens… you will not regret it for a minute and will be wondering why they hell you didn’t get one earlier.

Red Earth, Blue Sky Country

For more info read the Wikipedia link on Polarising Filters

#wtrip09 Quick Facts and Figures

Been home a week now and busy sorting out KML/GPX Files, dealing with photos and putting all the camping gear away.

So here are some of the facts and figures from the trip 🙂

Red Earth, Blue Sky Country

  • Minimum distance planned for the trip: 4,203 km
  • Total distance (that is door to door): 5025KM
  • Total Cost of Petrol: $623.24
  • Total Litres: 491.17
  • KM/Per Litre: 10.23
  • Most Expensive: 138.9 BP Cunummulla
  • Tweets where I wrote in the Lat/Long: 48
  • Early MorningPhotos: 5000+ (including family Xmas day ones)
  • Percentage of Photos Geotagged to within 20Meters: 95
  • Hardware Failures: 1 320 WD HD Drive… Rooted when we stopped in Canberra (MBR error)
  • Roadkill: 1 Bird (countless insects)
  • Near Miss: 1 Emu (missed by 30 cm or so)
    Driving into Rain (B&W Version)
  • Total Distance of Video for the trip: Approx 3300km (will try and rescue another 500km of video yet)
  • Total Distance Recorded as GPX files: 5000km (only one Nokia GPS fail on a small side trip)
  • Number of Twitter followers meet IRL for the first time (Not including a dog): 4
  • Number of Bolt of lighting seen: 4 (number missed because storms hit the day after I left 30K+!)
  • Number of States/Territories Driven in: 4
  • Damage to the Car: 1 Stone Chip to windscreen (Location Dual Carriage way just outside Taree of all places!), 1 blown rear power outlet.
  • Most Easterly Point: -28.636305°, 153.637817° (Cape Byron Light House)
  • Most Northerly Point: -26.397385°, 147.176207°
  • Highest Point: 850M -35.275425°, 149.097745° (Black Mountain Telstra Tower)
  • Lowest Point: 0 Meters (Surfers Paradise + Norah Head and other beaches)
  • Longest Distance Between traffic lights (not inc side trips): 1800km (from -35.836815°, 144.907532° which were roadworks in NSW to Dalby in QLD)

Storm Over the Field

I will put together the driving videos and the KML files when I have finished cleaning them up.  Most of the KML files are a lot larger than they need to be as I would leave the N95 running whilst I stopped to take photos and wandered around.

The rest of images I uploaded to Flickr are in my #Wtrip09 Set

Deadline for Calenders/Prints and T-Shirt

The deadline for Xmas delivery from Redbubble is approaching….

Australia: T-shirts: 13 December;  Prints and cards: 17 December; Calendars: 17 December

So all the Photos and prints I have are  here

a couple of  calendars…

Selective Colouring CalendarBlack and White Calendar


and t-shirts

I'll Take that as Comment

"I'm a small j journalist"

I found the higgs boson

Details on the Red Bubble Calendars

Click on the Calendars below to see each one in full size

3990393-2-black-and-whiteAustralian SunsetSelective Colouring

From Red Bubble….

1. Calendars are printed on high quality, high density paper that’s easy to write on
2. The cover and all pages are printed on 200gsm high quality satin art paper
3. Calendars have a hanger and white wire binding
4. They’re A3 size (297×420mm, or 11.69×16.54”)

They’re A3 size (that’s 297x420mm, or 11.69×16.54″)

and via standard shipping in Australia: 2 – 4 business days

FYI if I can sell a few of these I can get some new filters for my camera before my road trip at Xmas to Brisbane.

Only took 12 Months… but I got my lightning shot…

One of the reasons I always wanted a DSLR was so that I could get photos of the weather… and in particular lightning.   The reason for that was the long exposure lengths that you can take.  (of course by long I am only looking at 15seconds….) but my D90 was the first camera I have had in over 10 years that could do that..

Now I did get one shot of lightning last year with the D90 (with an obscured view… grrr)…. but this weekend everything fitted into place….  And those things were… the storm was at night, I was awake when the storm happened and I knew it was coming so I could get somewhere with a good clear view.  I spent an hour waiting at the beach for these shots (a big thanks to Cat for waiting with me… sorry it took so long)  but just before the rain hit I managed to get a couple of nice clear bolts over the city.

so here they are… (click for bigger, these are really best viewed large)

Shot using my gorilla pod as a tripod at the Jetty at the end of North Road, Brighton.

Camera: Nikon D90
Lens: Tokina 11-16mm
Exposure: 15s
Aperture: f/13.0
Focal Length: 11 mm
Exposure: -0.32
ISO Speed: 640
Exposure Program: Manual

Bolt of Melbourne 2

Bolt Over Melbourne

You will also notice on this shot how the water has bumps in it in the reflection of the lighting bolt.  Yet if you look to the left side of the image you will see that the water has smoothed out as it does from a standard 15second exposure.  The lighting flash is so bright as to burn that part of the image in stronger than that rest of the image.

#wtrip09 Melbourne To Bris-Vegas

Here it is…. dates and destination have been locked in….

The Only toy I am missing is a GPS for my D90…. what I am thinking is the Solmeta Geotagger N2 :-), but have to get Finance Committee sign off. (but with all the other expenses may drop off anyway.)

I have to be in Bris-Vegas, either Sat the 20th or Sun the 21st, but will be working out the day I leave much closer to the trip itself.

Remember if you know of something along the way that I should see (or even out of the way on the way…) leave me a comment below.

Melbourne to Brisbane… 6 Days on the Road… and 2,185 km

Day 1: Melbourne to Barmah – 253k

View Larger Map

Day2: Barmah to Hillston – 384k


View Larger Map

Day3: Hillston to Gundaooka National Park – 362k

View Larger Map

Day4: Gundaooka National Park to Charleville – 506k

View Larger Map

Day5: Charleville to Miles – 407k

View Larger Map

Day6: Miles to Brisbane – 335k

View Larger Map